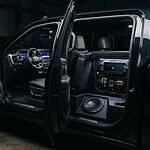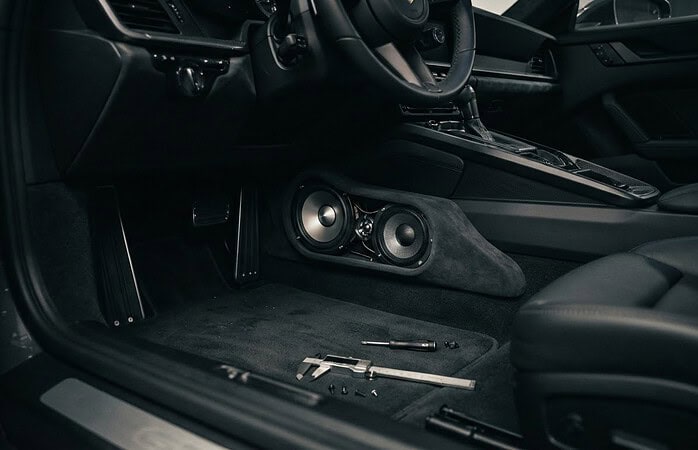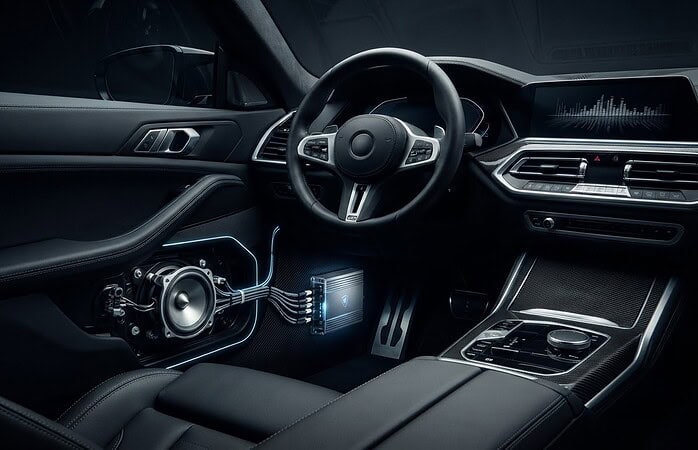
A Tesla Model 3 audio system upgrade of this type requires factory Premium Audio and isn’t compatible with Base Audio. In the 2024-and-newer Model 3, the Standard Sound System has nine speakers, while Premium Audio has 17. That platform difference is the first thing to understand before choosing an upgrade.
It’s easy to assume a speaker kit simply replaces the factory speakers. The right setup can also improve how the front and rear speakers work together, add more controlled bass, and provide stronger power while preserving access through the Tesla infotainment interface.
This guide explains which Model 3 platforms fit, what a speaker upgrade kit changes, and how subwoofer control, woofer power, and installation fit into the overall system. You’ll get a clearer picture of what the upgrade can do, which factory audio configuration it depends on, and what to consider when planning a finished installation.
Key Takeaways
- Start by identifying your Model 3’s factory audio platform: the described upgrade requires Premium Audio and isn’t compatible with Base Audio.
- Compare the kit’s front, center, and rear speaker components to understand what changes and how the sound can become more balanced.
- Learn how the subwoofer and amplifier fit into the system, and what to consider for bass control through Tesla infotainment.
- Use the factory front-door woofer layout and the upgrade’s power requirements to understand why component matching matters.
- See what a plug-and-play installation involves and how a custom installation can help bring the system together as a finished result.
Model 3 year and platform compatibility
Model year matters, but the factory audio platform is the decisive fit check. The upgrade discussed here requires factory optional Premium Audio and does not fit Base Audio vehicles.
Model Year Compatibility
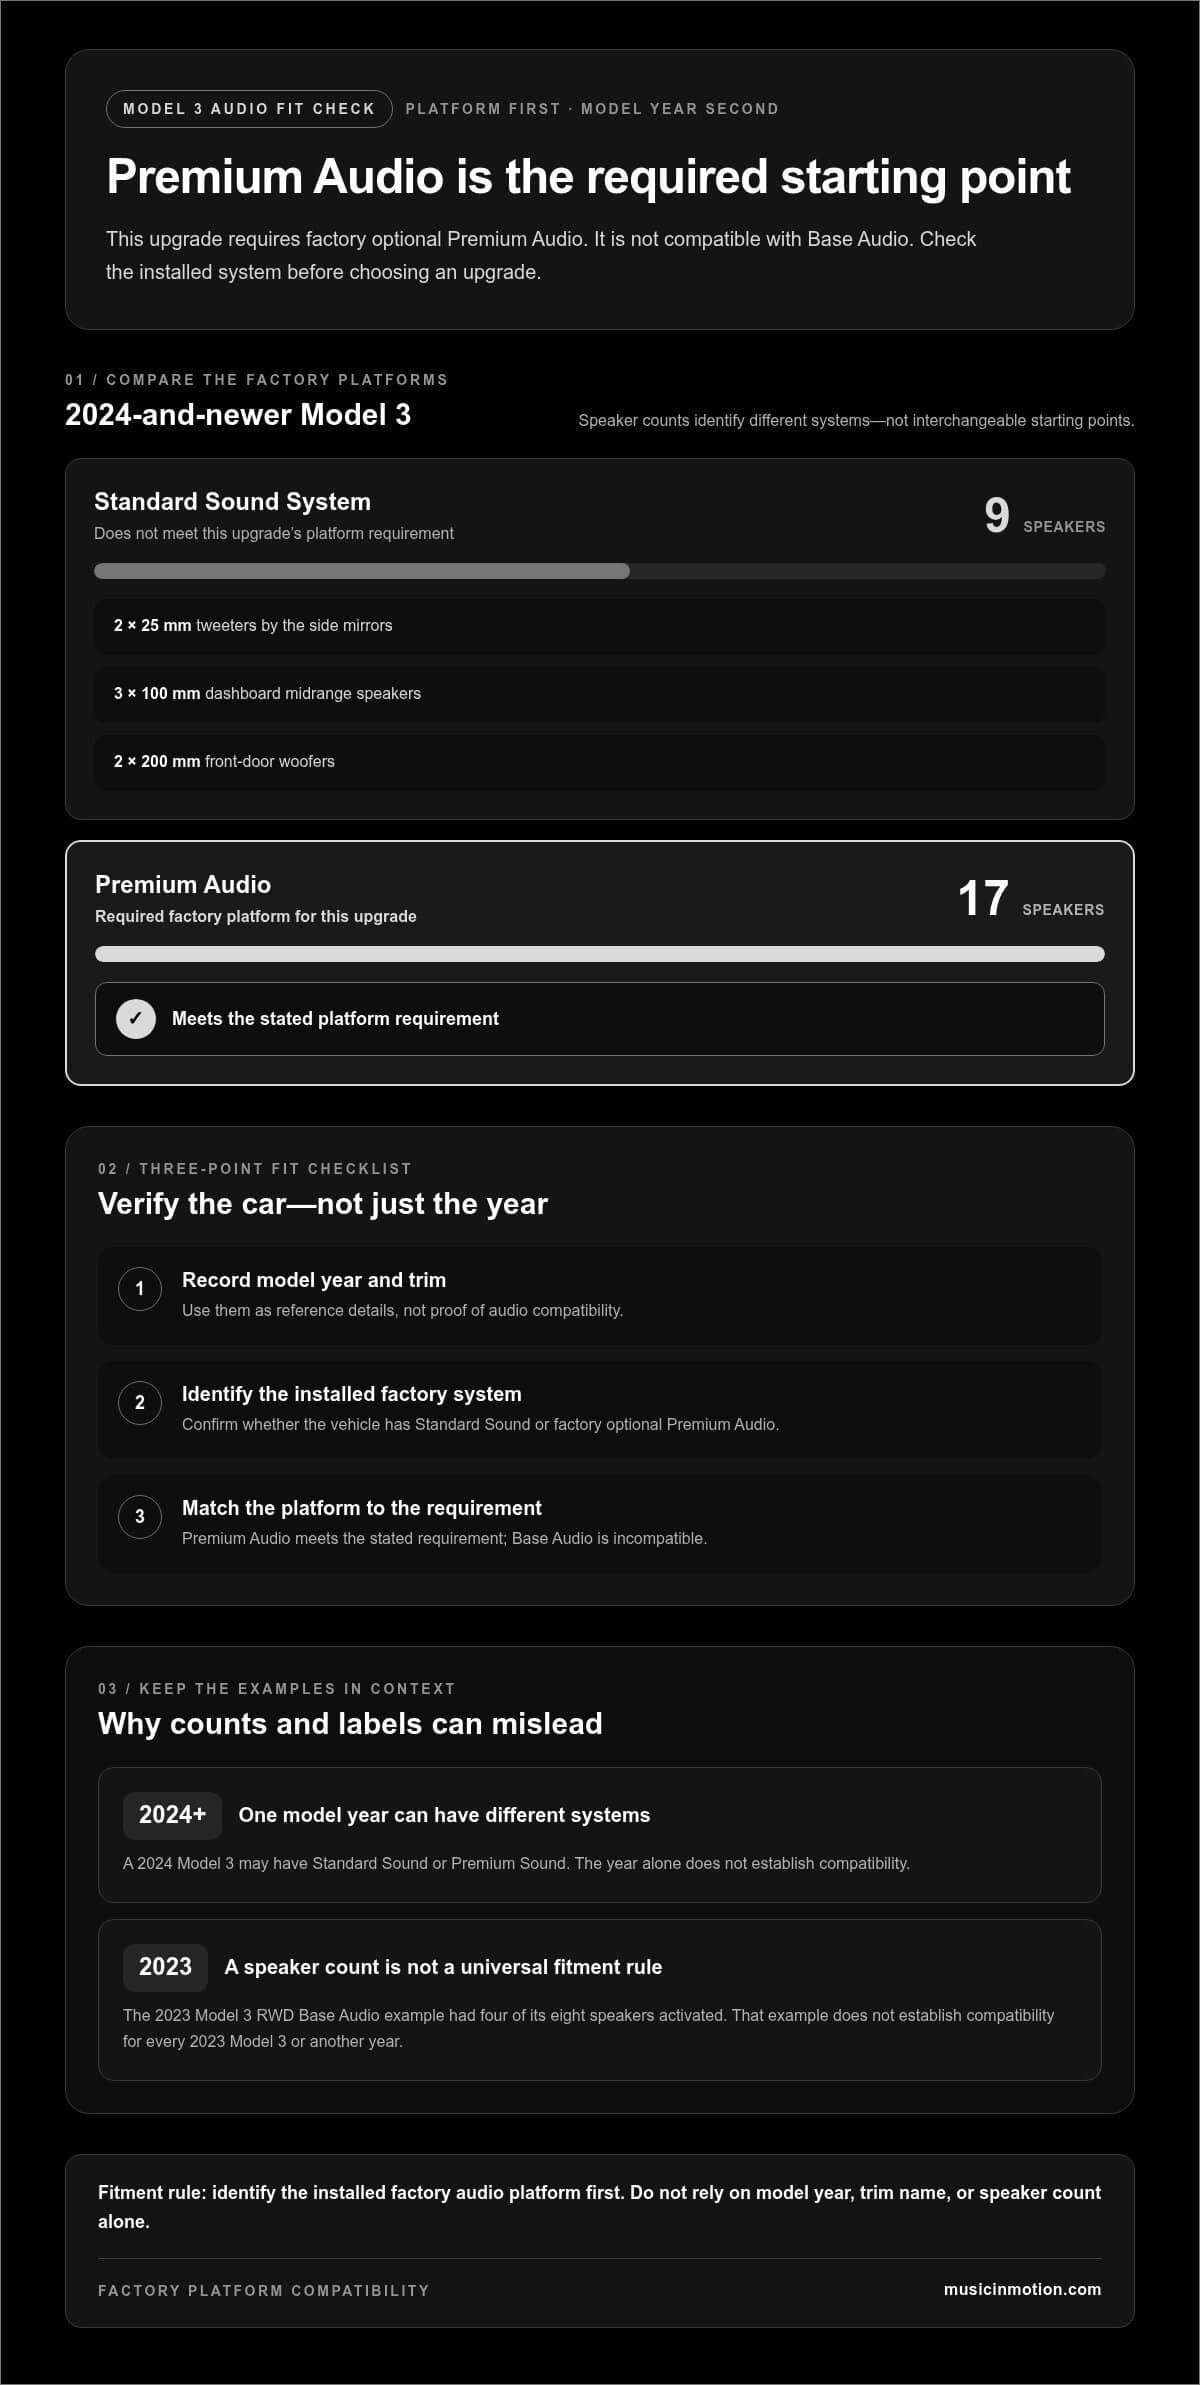
The current layout described for 2024-and-newer Model 3s includes a nine-speaker Standard Sound System and a 17-speaker Premium Sound System. Those figures identify two different factory platforms, not interchangeable upgrade starting points. For this upgrade, the required starting point is Premium Audio.
Use the model year as your first reference, then identify the installed audio system. A 2024 Model 3, for example, may have Standard Sound or Premium Sound; the year alone doesn’t establish compatibility. The same distinction matters when comparing vehicles listed with the same model year and trim name.
Earlier vehicles need the same platform-focused approach. The compatibility rule does not establish a complete year-by-year fitment range, so don’t treat a model-year label as proof. First identify whether the car has factory optional Premium Audio. This keeps assumptions based on year from replacing the essential equipment check.
Use these steps to narrow down the platform:
- Record the Model 3’s model year and trim.
- Identify whether the installed system is Standard Sound or Premium Audio.
- Match the upgrade to the required factory Premium Audio platform.
Compatibility Limitations
The core limitation is audio-platform based: the upgrade requires factory optional Premium Audio and is incompatible with Base Audio. A 2024-and-newer Model 3 with the nine-speaker Standard Sound System does not meet that requirement simply because it shares the same body style. The 17-speaker Premium configuration is the relevant platform in that year range.
Year-specific layouts help explain why checking the system matters. The described current Standard layout has two 25 mm tweeters by the side mirrors and three 100 mm dashboard midrange speakers. It also has two 200 mm front-door woofers. These component details describe the Standard layout; they don’t override the Premium Audio requirement.
Older examples show why speaker counts alone can mislead. The 2023 Model 3 RWD Base Audio system was described as having four of its eight speakers activated. That example doesn’t establish compatibility for every 2023 Model 3 or another year. Identify the installed factory platform rather than relying on a count, trim label, or assumption about the model year.
For a practical fit decision, separate three details: year, factory system, and the upgrade’s required platform. If the car has Base Audio, this upgrade is incompatible. If it has factory optional Premium Audio, it meets the stated platform requirement. That distinction is more useful than treating all Model 3 audio systems as the same configuration.
Speaker upgrade kit components and sound improvements
A speaker kit changes more than the number of drivers in the cabin. Its components determine where music gains detail, focus, and coverage.
Upgrade Kit Components
The described Tesla Model 3 and Model Y upgrade is a seven-speaker package. It includes two front midrange drivers, two front tweeters, one front-center coaxial driver, and two rear coaxial drivers. This layout distributes changes across the front soundstage and rear cabin rather than replacing only one speaker pair.
Before choosing a kit, map each component to its position. The two midrange drivers and tweeters serve the front, while the center coaxial driver adds another sound source in the dashboard. Rear coaxial drivers combine high- and mid-frequency reproduction in each unit, keeping the package compact.
- Front: two midrange drivers and two tweeters
- Front center: one coaxial driver
- Rear: two coaxial drivers
The Ultimate 12 tweeter specifications provide another useful component example: each is rated at 22W continuous RMS and 50W peak power. Its sensitivity is 96dB (1W/1m). RMS describes continuous power handling, while peak describes short-duration handling. Compare both ratings alongside the rest of the system, rather than treating peak power as the sole measure of performance.
Sound Improvements
Dedicated tweeters and midrange drivers can separate musical details across the front of the cabin. Voices and instruments may sound more distinct when the components and their placement work together. A center coaxial driver also adds sound from the middle of the dashboard, while rear coaxials extend coverage behind the front seats.
Listen for changes in specific material, not just overall loudness. Try spoken vocals, layered acoustic music, and tracks with percussion. Clear vocal placement, distinct instrument edges, and consistent sound between the front and rear seats are useful cues. A speaker swap alone doesn’t determine how the whole system will sound: tuning and integration also influence the result.
Power and sensitivity ratings help explain how a driver fits the system, but they don’t independently predict the listening experience. For example, the Ultimate 12 tweeter’s 96dB sensitivity rating describes output relative to its stated input and measurement distance. Use specifications to compare components, then consider their role, placement, and relationship to the other speakers.
A practical selection process is straightforward: match the kit’s driver positions to the intended upgrade, compare continuous power ratings, and assess the desired front-to-rear balance. A tailored car audio upgrade can bring those choices together as a complete system rather than an isolated speaker swap.
Tesla infotainment integration and subwoofer control
Infotainment integration depends on the factory audio platform, amplifier, and signal path. Match those elements before deciding whether speakers, bass, or added power should lead the upgrade.
Speakers affect how vocals and instruments are reproduced; a subwoofer adds low-frequency output, while an amplifier supplies power to connected drivers. Choose based on the main shortfall you hear, then consider how each component will work with the existing system.
For a 2024 Model 3, the Premium Sound System has a combined amplifier rating of 560 W and two 200 mm trunk subwoofers. The Standard Sound System amplifier is rated at 200 W of assumed peak power. These factory configurations are different starting points, so an upgrade designed for Premium Audio shouldn’t be treated as a Base Audio fit.
A Premium-platform subwoofer upgrade can add dedicated bass while retaining the Tesla infotainment system as the everyday control interface. The described Model 3 and Model Y upgrade uses an 8-inch subwoofer system, with 300 Watts RMS power handling. Its included amplifier is rated at 300 Watts RMS and delivers 150 W per channel. That pairing supplies a defined power path for the subwoofer rather than relying only on factory amplification.
Base Audio requires a different compatibility decision. The described upgrade requires factory optional Premium Audio and is incompatible with Base Audio vehicles. So, a Base Audio DSP amplifier and subwoofer plan cannot be assumed to use the Premium package. Let the factory platform and signal path guide component selection.
Subwoofer sensitivity also helps describe system behavior. The Light Harmonic Ultimate 12 subwoofer is rated at 86.5 dB (1W/1m). Read that figure alongside amplifier output and the subwoofer’s power handling, not as a standalone measure of loudness. The enclosure and installation also influence how bass is delivered in the cabin.
Aftermarket equipment can affect vehicle electronics if wiring or signal integration is incorrect. Warranty coverage depends on the applicable terms and the diagnosed issue. Keep installation details and review the coverage conditions relevant to the affected component.
In the United States, look for a car-audio installer experienced with Tesla platform integration, factory signal paths, and amplifier matching. Ask for a clear explanation of how the proposed system will preserve infotainment control and operate with your Model 3’s factory audio configuration.
Before choosing components, identify the factory system, define the sound change you want, and match the amplifier and subwoofer as a system. This sequence keeps infotainment, bass control, and power requirements connected in one plan.
Front door woofer power and sensitivity
The Tesla Model 3 Standard Sound System has two 200 mm woofers, one at the bottom of each front door. These drivers handle low-frequency and midbass information, helping give kick drums, bass guitar, and lower musical notes weight. Their size describes the speaker diameter, not its power rating or sensitivity. Those specifications answer different questions and should be considered separately.
Power describes the electrical input a woofer can handle, while amplifier output describes the power available to drive it. Match them using the speaker’s continuous power-handling specification and the amplifier’s clean output. Peak ratings alone don’t describe sustained listening. Pushing an amplifier beyond its clean operating range can increase distortion, so the system needs suitable power and gain settings.
Sensitivity describes how efficiently a speaker converts input power into sound under stated test conditions. A more sensitive woofer can produce more output from the same input when compared under equivalent conditions. The Model 3 door woofer’s exact sensitivity figure isn’t provided here, so compare actual component specifications rather than assuming that a 200 mm diameter predicts loudness.
Door installation also affects bass. A front-door woofer works with the space and mounting surface around it, so a loose fit or air leak can weaken impact or cause unwanted vibration. Secure mounting, suitable sealing, and correct polarity help the left and right woofers work together. For example, reversing polarity on one side can reduce bass around the listening position.
Use these checks when comparing replacement woofers:
- Match the driver’s physical fit to the Model 3 front-door location.
- Compare continuous power handling with the amplifier’s clean output.
- Review sensitivity alongside impedance and the rest of the system.
- Plan mounting, sealing, and polarity as part of the installation.
Impedance affects how an amplifier responds to a connected speaker, so compatibility matters alongside power ratings. Don’t select a woofer from diameter alone. A 200 mm replacement can still differ in impedance, sensitivity, mounting depth, and power handling. Each specification influences fit or system performance, and the complete combination matters more than one headline number.
After installation, evaluate the Model 3 with familiar music at a normal listening level. Listen for even bass from both front doors, clean impact, and rattles during low notes. If the bass sounds uneven, review polarity, mounting, and system tuning before changing amplifier gain. Those practical checks help distinguish a woofer issue from an installation or integration problem.
Plug-and-play installation
“Plug-and-play” describes components designed to connect with existing vehicle wiring through compatible connectors. In a Tesla Model 3, the label doesn’t replace fitment checks: the factory audio platform, component connections, and installation instructions still matter. A speaker activation kit, for example, differs from replacing speakers or adding an amplifier, so identify the work involved before starting.
A reported speaker-activation-kit installation was described as relatively easy. That example applies to that kit and installation, not every Model 3 audio project. Replacing door speakers, routing amplifier connections, or integrating a subwoofer can involve different access, wiring, and system-matching requirements. The more components involved, the more important it is to follow the instructions for the exact parts and vehicle.
The main risks of installing a Tesla Model 3 audio upgrade yourself are damaging trim or connectors, wiring components incorrectly, and creating poor sound or electrical faults. Incorrect fitment or signal connections can also leave speakers silent, out of phase, or improperly powered.
Before beginning, compare the kit instructions with the Model 3’s year and factory audio configuration. Confirm that each connector and component matches the intended system. Keep fasteners organized as panels are removed, and use appropriate trim tools to reduce the chance of marking interior surfaces. Don’t force a connector or panel that resists removal; resistance can indicate a missed fastener or mismatched connection.
A careful installation follows a clear sequence:
- Read the component instructions and map each speaker or connector position.
- Protect the Model 3 interior before removing panels or accessing speaker locations.
- Connect only components that match the identified factory platform.
- Secure wiring away from moving parts and panel edges.
- Test each speaker and the infotainment controls before reinstalling trim.
Testing before reassembly makes troubleshooting simpler. Play familiar music and check each speaker position, then adjust balance and fade through Tesla infotainment. Listen for silence, distortion, rattles, or bass that changes when you shift the balance. If a problem appears, inspect the related connection and component instructions before changing settings or increasing amplifier output.
DIY work makes sense when the task is limited, the instructions are clear, and you’re comfortable removing vehicle trim and handling audio connections. A system involving amplifier integration, subwoofer wiring, or custom fitment requires more coordination between components. In those cases, professional installation can help bring the wiring, sound, and finished interior together.
For a Model 3 installation that needs component matching or careful integration, schedule a car audio installation and discuss the system you want to build.
Music In Motion: Car Audio Upgrades
Music In Motion helps drivers plan car audio upgrades and custom installations around their vehicle and listening goals. For a Model 3, that can mean discussing how speakers, amplification, and bass fit together as one finished system, rather than treating each component as a separate purchase.
Music In Motion can help translate your sound goals into a practical installation plan. If deeper bass is the priority, the company also builds custom subwoofer enclosures. The right approach depends on your factory audio platform, the components you want changed, and how you use the car.
Bring your Model 3 audio questions to the team and contact Music In Motion to discuss your upgrade.
Make Your Next Drive Sound More Like You
Start by defining what you want to hear differently. Is your priority clearer vocals, fuller bass, or a more engaging sound throughout the cabin? Your preferences give an audio specialist a practical starting point for shaping a system around your listening habits.
A Tesla Model 3 audio system upgrade works best as a complete plan, not just a parts list. Music In Motion offers car audio upgrades and custom installations, with the same hands-on approach extending to marine audio systems. Share what you enjoy listening to and what you want to improve, then discuss an installation that suits your vehicle and goals.
You don’t need to arrive with every component already chosen. A conversation can help turn your priorities into a clear direction for the finished system. Contact Music In Motion to talk through your Model 3 audio plans and take the next step toward a more enjoyable drive.
Frequently Asked Questions
Which Tesla Model 3 audio system versions and factory speakers vary by year and trim?
For 2024-and-newer Model 3s, the Standard Sound System has nine speakers, while Premium Sound has 17. The described 2023 Model 3 RWD Base Audio system had four of its eight speakers activated. These examples show why trim or model year alone can be misleading. Identify the installed audio platform and check the vehicle’s actual speaker configuration before choosing replacement components.
What are the best Tesla Model 3 audio upgrade options for sound quality?
The best option depends on what you want to improve: speaker changes can target clarity, while a subwoofer upgrade focuses on low-frequency impact. Amplification can address the power available to compatible components. For a Tesla Model 3 audio system upgrade, choose based on what you hear in familiar music. For example, distinguish muddy vocals from weak bass before selecting parts, then evaluate the complete system together.
How much do Tesla Model 3 speaker, subwoofer, and amplifier upgrades cost?
The price depends on the vehicle and project, and is provided after a quote request. Cost factors include the speakers or amplifiers selected, whether the project includes a subwoofer and enclosure, and the level of custom integration required. A speaker-only project differs from one that adds amplification and bass components. Comparing the planned parts and installation scope gives a more useful estimate than comparing component names alone.
Can you upgrade the Tesla Model 3 audio system without cutting factory wiring?
Yes, a compatible plug-and-play harness can connect equipment without cutting factory wiring. The key is matching its connectors and signal path to the Model 3’s specific factory audio platform. Before installation, compare the harness instructions with the vehicle configuration and every component connection. A speaker activation kit and a system adding an amplifier are different jobs, so the wiring approach must suit the complete upgrade.
What are the steps to install an aftermarket audio system in a Tesla Model 3?
Start by identifying the factory audio platform, then select components and instructions designed for that configuration. Map the connections before removing trim, and keep fasteners organized. Install the components and route wiring as specified, then test each speaker, infotainment control, and audio setting before completing the interior reassembly. If one channel sounds different, check its connection and polarity before changing system settings.
Which audio upgrades are compatible with each Tesla Model 3 model year?
Compatibility depends on the factory audio platform, not the model year alone. The described upgrade requires factory optional Premium Audio and is incompatible with Base Audio vehicles. For 2024-and-newer Model 3s, distinguish the nine-speaker Standard Sound System from the 17-speaker Premium Sound System. For other years, identify the installed system and match the upgrade’s fitment requirements to that configuration before selecting components.