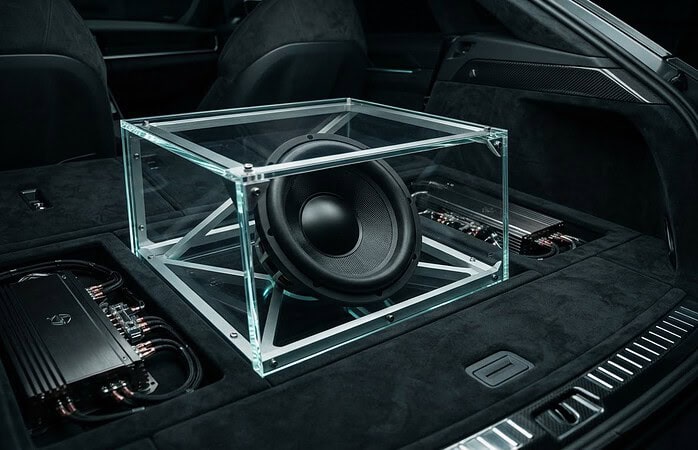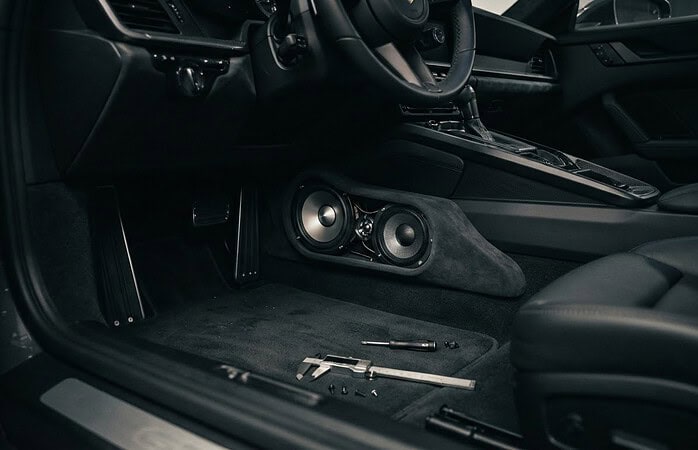
A direct-fit subwoofer enclosure can make an F-150 audio upgrade easier to plan, but the truck’s year and factory system still matter. Yes, you can install speakers, add a subwoofer, and set amplifier gains yourself if you’re comfortable working with trim, wiring, and audio settings. This Ford F-150 audio upgrade guide explains where a direct-fit enclosure fits and how to choose a practical setup.
It’s easy to focus first on speaker size or amplifier power. Start instead with the whole system: front and rear speakers, subwoofer and enclosure, radio features, and factory audio configuration. For example, replacing speakers may require an adapter and wiring pigtails, while a B&O-equipped truck needs a different interface than a non-B&O setup.
Here, you’ll see example combinations for speakers, powered and amplified subwoofers, plus direct-fit enclosure considerations. We’ll also cover radio choices and a straightforward way to check amplifier gains for distortion, so you can shape a system around your F-150 and the sound you want.
Key Takeaways
- Match speakers to the F-150’s cab, factory system, and mounting locations; some replacements need adapters and wiring pigtails.
- A direct-fit subwoofer enclosure can help make the bass upgrade work with the truck’s available space. Compare powered and amplifier-driven setups before choosing.
- B&O-equipped trucks use factory amplification, so their audio interface needs differ from non-B&O systems.
- Set amplifier gains with clean test signals and listen for distortion; gain controls aren’t simply volume knobs.
- Choose an aftermarket radio around the truck’s year, dashboard fit, and the features you want to retain.
Aftermarket speaker and subwoofer installation
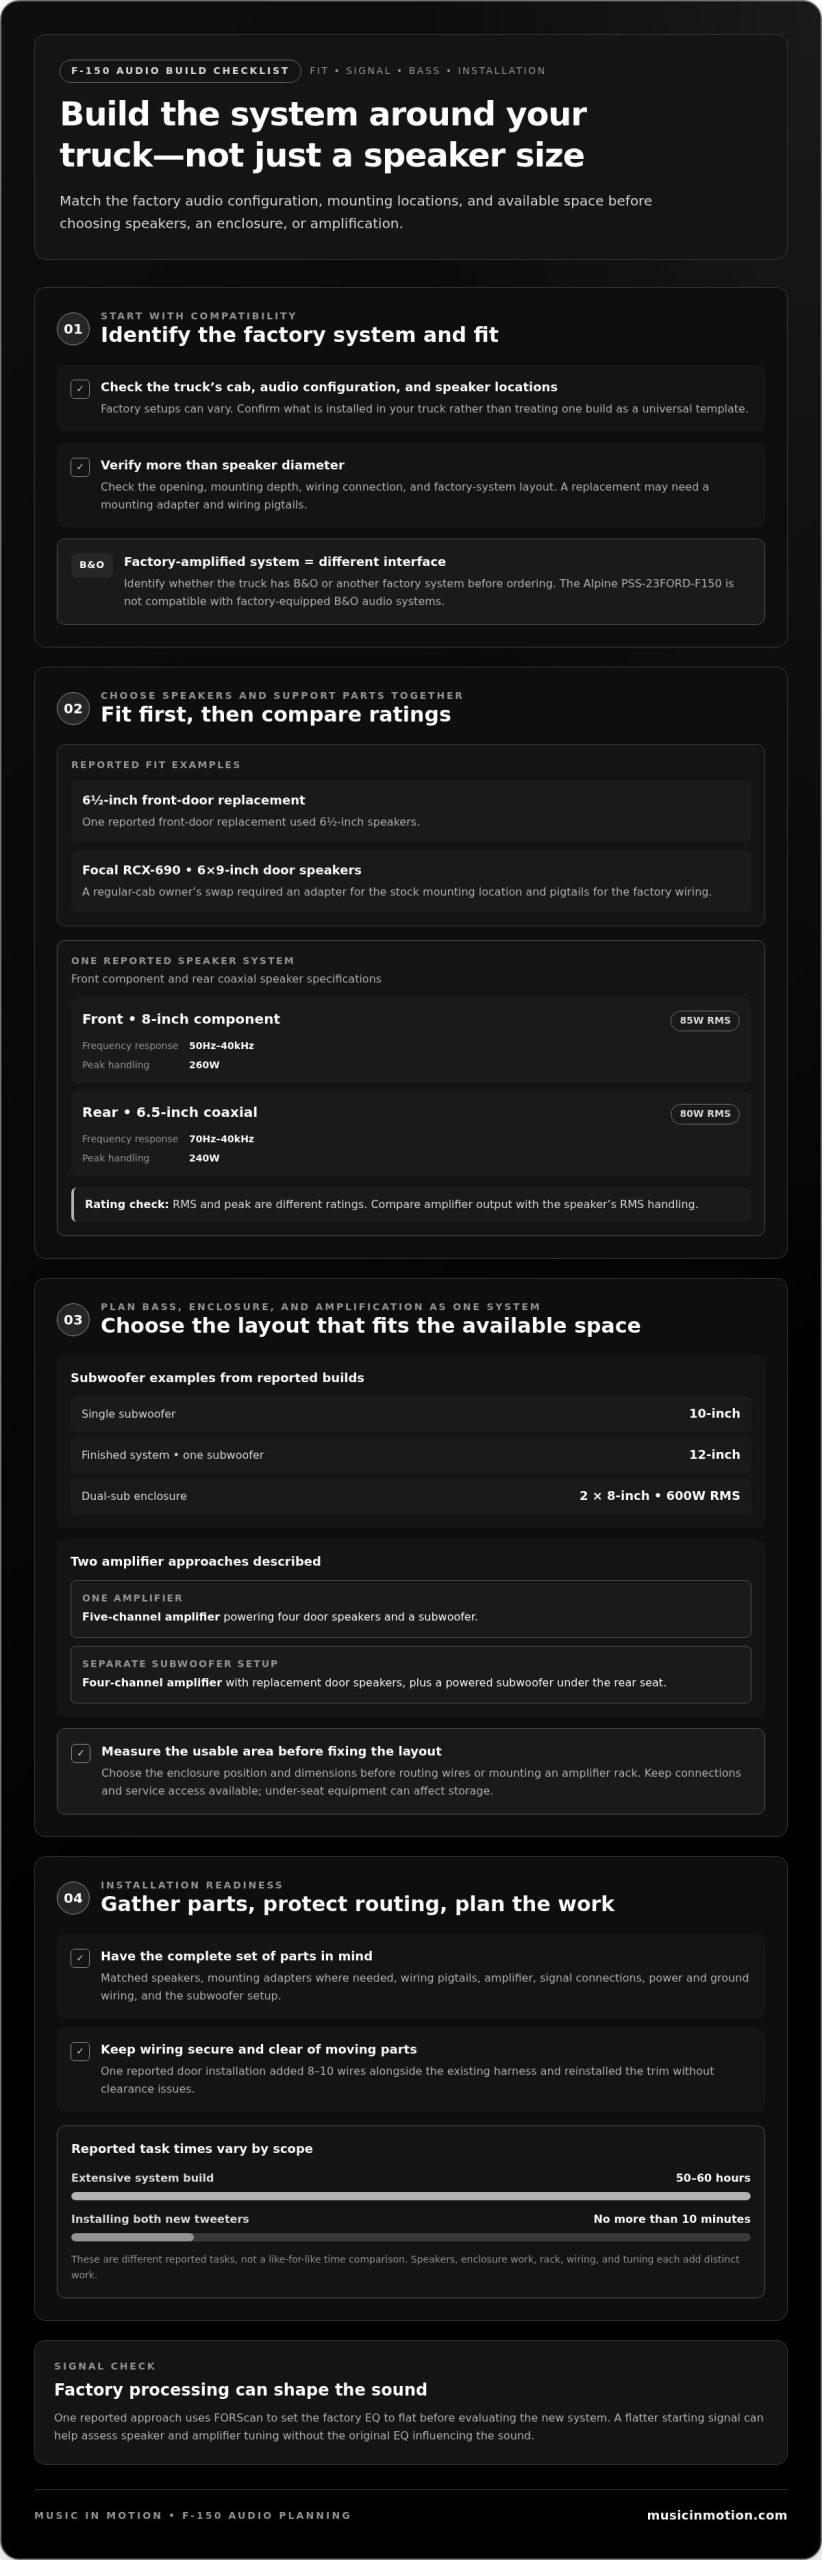
An F-150 audio build can start with door speakers or combine speakers, amplification, and a subwoofer. The right parts depend on the cab, factory system, speaker locations, and desired bass. Factory audio configurations can vary, so check the system in your truck before choosing replacement parts. Treat that configuration as an example, not a template for every truck.
Choose speakers and supporting parts together
One reported front-door replacement used 6 1/2-inch speakers. Another regular-cab F-150 owner replaced factory door speakers with Focal RCX-690 6×9 speakers. That 6×9 swap required an adapter for the stock mounting location and pigtails for the factory wiring. Those examples show why speaker diameter alone doesn’t establish fit. Confirm the opening, mounting depth, wiring connection, and factory-system layout before choosing components.
A separate system used 8-inch component front speakers rated at 85W RMS, alongside 6.5-inch coaxial rear speakers rated at 80W RMS. Its front speakers had a 50Hz-40kHz frequency response and 260W peak handling; the rear pair had a 70Hz-40kHz response and 240W peak handling. RMS and peak figures describe different ratings, so compare amplifier output with the speaker’s RMS handling.
For installation, gather the matched speakers, mounting adapters where needed, wiring pigtails, amplifier, signal connections, power and ground wiring, and the subwoofer setup. Keep the wiring secure and clear of moving parts. A reported door installation added 8-10 wires alongside the existing harness, then reinstalled the trim without clearance issues.
Plan the subwoofer, enclosure, and amplifier rack
Situation: A system needs stronger bass without relying on door speakers. Action: Choose a subwoofer and enclosure together, then match amplifier power to the subwoofer’s requirements. Examples include a single 10-inch subwoofer, a finished system with one 12-inch subwoofer, and a dual 8-inch enclosure rated for 600W RMS. Result: The enclosure choice shapes the available layout and bass system; its fit must suit the truck’s usable space.
A custom subwoofer enclosure can be built around the F-150’s available area and the selected subwoofer. Decide its position and dimensions before routing wires or fixing an amplifier rack. The rack should secure the amplifier while leaving room for connections and service access. A five-channel amplifier can power four door speakers and a subwoofer; an alternative example paired a four-channel amplifier with replacement door speakers and a powered subwoofer under the rear seat.
Installation time varies with the scope. A reported extensive build took 50-60 hours, excluding article-writing time, while installing both new tweeters took no more than 10 minutes. Those examples describe very different tasks. A speaker swap, custom enclosure, amplifier rack, wiring, and tuning each add distinct work, so plan the sequence around the complete system rather than one component.
My F150 has the B&O system – what do I order?
For an F-150 with B&O audio, order an interface designed for its factory-amplified system. Bang & Olufsen-equipped trucks use factory amplification and need a different interface from the one used in the installation example. The Alpine PSS-23FORD-F150 is not compatible with factory-equipped B&O audio systems.
Poorly connected aftermarket equipment can contribute to battery drain, so use appropriate wiring and secure every connection. Warranty coverage depends on the vehicle, component, and terms. Keep installation records and review applicable coverage before modifying factory equipment.
Situation: A truck has an unfamiliar factory system, perhaps Sony or B&O. Action: Identify the system and whether it uses factory amplification before ordering an interface. Result: You can select equipment around the signal path already in the truck, rather than assuming every F-150 uses the same connection. The B&O example shows why the system name matters: an interface intended for another configuration may not work.
Factory audio processing can shape the signal before it reaches replacement equipment. One reported approach is to use FORScan to set the factory EQ to flat before evaluating the new system. Starting with a flatter signal can make it easier to assess speaker and amplifier tuning without the original EQ influencing the sound.
Keep the factory controls and cabin layout in mind
Replacing the head unit isn’t the only way to improve an F-150 system. Retaining the factory radio keeps the original dashboard appearance and avoids making the screen swap the center of the project. If you do replace it, plan for the truck’s factory connections and controls. The interface must suit the installed audio system, especially when factory amplification is present.
Under-seat storage affects where a subwoofer and amplifier can go. Before choosing an enclosure, measure the usable space and decide what needs to remain accessible. One reported setup uses a compact powered subwoofer under the rear seat, replacement door speakers, and a four-channel amplifier. This keeps the layout contained, while a larger enclosure may reduce available storage.
Factory audio may leave you wanting more impact, clearer playback, or better tonal control. Replacing the head unit alone won’t fix every limitation if factory amplification or signal processing remains in the chain. Trace the signal from radio to amplifier to speakers, then decide whether to keep the factory radio, add an interface, or replace components. For B&O trucks, confirm compatibility first. For Sony-equipped trucks, identify the installed system before choosing an interface and planning a factory-style installation.
Setting gains and checking for distortion
Amplifier gain matches the amplifier’s input sensitivity to the signal from the head unit. It isn’t a volume control. Turning gain too high can make the amplifier distort before the radio reaches its clean output. In one F-150 installation, the installer backed the head-unit volume down to around 25-27 to eliminate distortion during gain setting. Treat that as an example, not a universal setting for every radio.
Situation: A new amplifier powers front or rear speakers, or a subwoofer, but the system sounds harsh at higher volume. Action: Check the source signal and set each amplifier channel using a suitable test tone. Result: Properly matched input sensitivity helps the system play cleanly without using gain to mask a weak source signal.
Use a separate test signal for each frequency range. A 1 kHz signal was used to check the front-channel signal and set amplifier gains. A 40 Hz signal was used to check the subwoofer channel and set monoblock amplifier gains. These tones help isolate the channel being adjusted. Keep the front-channel test separate from the subwoofer test, and follow the amplifier’s adjustment process.
Work through the gain setting in order
- Prepare the signal. Set the F-150’s audio controls to a consistent starting point. Turn off processing or equalization that changes the test tone, then select the appropriate signal for the channel.
- Find a clean source level. Raise the head-unit volume gradually while playing the test signal. Stop below the point where the signal distorts. In one example, the installer reduced volume to around 25-27 during adjustment.
- Adjust the amplifier. With the signal playing, raise the relevant channel’s gain gradually. Check the front channels with 1 kHz and the subwoofer channel with 40 Hz. Stop once the signal reaches the intended output without distortion.
- Repeat by channel. Set front, rear, and subwoofer channels separately. A five-channel amplifier driving four speakers and a subwoofer, for example, has different channels to check.
One installer completed head-unit gain setting with test signals in about 10-15 minutes. That example shows the adjustment can be systematic, but the time depends on the equipment and channel layout. Write down the final settings so changes remain traceable. If the sound becomes rough later, lower the source volume and inspect the signal path before increasing gain again.
After test tones, play familiar music through the F-150’s radio. Listen for harshness, breakup, or bass that sounds strained as volume rises. A clean test-tone setup provides a starting point, while normal listening reveals how the full system behaves. Recheck the front and subwoofer channels separately if distortion appears in only one part of the sound.
Aftermarket radio features and screen sizes
Choose an aftermarket radio by F-150 model year, dashboard fit, factory controls, and the features you’ll use. Screen size is only one part of the decision. A larger display may make menus easier to see, but the radio must also fit the dashboard and work with the truck’s climate-control layout. Match the unit to the specific F-150 before choosing features.
A concrete example is an aftermarket radio listed for 2009-2012 Ford F-150 models with automatic climate control. It has a 9-inch screen, 2GB of RAM, and 32/64GB storage. Those specifications describe that particular radio, not every F-150-compatible option. Check that the year range and climate-control version match the truck, then consider how the screen sits within the dashboard.
Choose features around daily use
Begin with the functions you want from the driver’s seat. List your priorities, such as smartphone connection, radio controls, screen visibility, and factory functions you want to keep. Compare the radio’s stated features with that list. A screen may look impressive but offer little value if its controls feel awkward or it interferes with familiar climate adjustments.
Audio source quality matters, too. One reported recommendation is to use a wired iPhone or iPad connection for lossless audio, since Bluetooth does not provide enough bandwidth for it. If detailed playback matters to you, include a wired connection in your requirements. Bluetooth can still work well for everyday wireless listening, with a wired option available when you want it.
Situation: An F-150 owner wants a larger display and improved access to media. Action: Compare the radio’s screen, connection options, climate-control fit, and compatibility with the truck’s factory audio. Result: The selected unit is based on the full dashboard and listening setup, not screen size alone.
Check integration before choosing a screen
Before installation, identify the F-150’s model year, factory radio, and audio system. A factory-amplified setup needs a compatible signal interface, and B&O trucks require a different interface from the one used in a non-B&O installation. A replacement radio doesn’t automatically solve factory-system compatibility. Confirm the planned signal path from the head unit to the speakers and amplifiers.
Finally, compare the installed screen position with the controls you use most. Consider whether the display blocks access to climate settings or makes common audio adjustments harder. The 9-inch 2009-2012 example shows why screen dimensions and automatic climate control belong in the same fit check. Choose a radio that suits the truck’s dashboard, preserves the functions you rely on, and supports the connection method you prefer.
What are the factory speaker sizes and locations in the Ford F-150?
There isn’t one speaker layout to assume across every F-150. Cab style, model year, and factory audio package affect the system. A featured 2021 truck had a seven-speaker factory system, rather than Bang & Olufsen audio. Use that as one configuration example, not a universal size chart. Before ordering replacements, identify the truck’s factory system and inspect each speaker location.
Available installation examples show why measurements matter. One front-door installation used 6 1/2-inch speakers, while another F-150 setup used 8-inch component front speakers. A regular-cab owner replaced factory door speakers with 6×9 speakers. These are different examples, not proof that every F-150 has the same factory fit. A speaker’s nominal diameter doesn’t account for its mounting depth, opening shape, or adapter requirements.
For the rear, one system used 6.5-inch coaxial speakers rated at 80W RMS. That system example helps illustrate the role of rear speakers, but doesn’t establish a fit for every cab or audio package. Check whether the truck has rear doors and identify the existing mounting location before matching a replacement. Compare the new speaker’s frame and depth with the available opening, then plan any required adapter.
Identify each location before ordering
Use this practical sequence to avoid choosing parts based on an incomplete assumption about size:
- Identify the truck. Note its model year, cab style, and factory audio package. A seven-speaker 2021 system and a B&O-equipped system shouldn’t be treated as identical.
- Map the locations. Record which front-door and rear locations contain speakers. Include tweeters where present, rather than counting only door speakers.
- Inspect the mounting. Compare the installed speaker’s frame, depth, connector, and mounting points with the replacement. A 6×9 installation may need a mounting adapter and wiring pigtails.
- Match power sensibly. One system’s rear coaxial speakers were rated at 80W RMS. Compare speaker RMS handling with the amplifier’s output, not its peak rating alone.
Situation: An F-150 owner wants to replace the front and rear speakers. Action: They identify the cab and factory system, then inspect each mounting location before ordering. Result: The chosen speakers and adapters reflect the actual truck, rather than a size recommendation copied from another configuration.
For a Ford F-150 audio upgrade guide, the useful takeaway is to treat speaker sizes as location-specific examples. The 6 1/2-inch front-door installation, 8-inch component setup, 6×9 replacement, and 6.5-inch rear coaxial example don’t form one universal package. Match every replacement to its position, mounting hardware, wiring, and factory system.
Music In Motion: Car Audio Upgrades
Music In Motion helps F-150 owners bring speaker, amplifier, radio, and subwoofer choices together through Car Audio Upgrades and Custom Installations. Turn to the team when factory-system compatibility, limited cabin space, or a custom enclosure makes the parts list difficult to coordinate. A Custom Subwoofer Enclosure can be tailored to the audio project and available truck space, while the installation plan accounts for how the components work as a complete system.
Bring your F-150’s model year, cab style, factory audio details, and preferred listening priorities into the conversation. These details help shape an upgrade around the truck rather than a generic setup. Contact Music In Motion to discuss your F-150 audio upgrade.
Build an F-150 system around how you drive
Your next step is to turn your listening priorities into a complete system plan. Decide what matters most behind the wheel, then consider how each choice supports that goal. A Ford F-150 audio upgrade guide is most useful when it helps you move from comparing components to shaping a setup that fits your truck and daily routine.
Music In Motion offers Car Audio Upgrades and Custom Installations for drivers planning their next system. Its services also include Marine Audio Systems, with tailored sound solutions for time on the water. The aim is a setup that works for your vehicle, rather than simply a collection of parts.
Share what you want to change in your F-150 and explore an installation approach that fits your priorities. Contact Music In Motion to start the conversation and move toward a more rewarding drive.
Frequently Asked Questions
Can I install it myself?
A DIY installation is possible if you’re comfortable removing trim, routing wiring, and making secure connections. Photograph the factory connections and label each wire before disconnecting anything. Work through one area at a time, and test the system before reinstalling all the panels. Replacing a speaker is a different project from adding an amplifier, custom enclosure, and new radio, which requires coordinating more components.
Can I keep my steering wheel buttons?
Steering wheel buttons can often remain usable with a compatible radio interface, but compatibility depends on the truck’s model year, factory system, and replacement radio. Identify the buttons you use and confirm the interface supports them before choosing a head unit. Consider factory amplification and other controls connected to the original radio, too. A radio that fits physically may still need the right integration components.
My truck is an SVT Raptor or Platinum, which radio fits?
Choose by model year, dashboard configuration, and factory audio system, not by the Raptor or Platinum badge alone. These details determine the radio’s physical fit and the integration parts required to retain factory functions. Note the current radio’s appearance and controls, then compare them with the replacement’s fit and connection requirements. The trim name helps identify the truck, but you still need to check its actual dashboard and audio setup.
Quick answer: which radio fits your F150?
A 9-inch aftermarket radio is one listed example for 2009-2012 Ford F-150 models with automatic climate control. That example doesn’t establish fit for other years or dashboard configurations. For a quick match, start with the model year and climate-control layout, then account for the factory audio system and controls you want to retain. Screen size alone can’t determine whether a radio integrates correctly.
Which Ford F-150 model years and trim levels have different factory audio systems?
Factory audio varies by configuration, so model year and trim alone aren’t enough to identify every system. Factory audio configurations can differ, so identify your truck’s system before planning an upgrade. Treat these as distinct system types when planning upgrades. Identify the audio equipment in your truck first, then select components and interfaces for that configuration instead of relying on a trim-based assumption.
How do you identify the F-150’s factory audio system and wiring connections?
Start with the truck’s model year, cab, factory audio branding, and existing radio controls. Inspect the speaker and radio connections before ordering parts. Compare connector shapes and mounting points, and note whether the system has factory amplification. Photograph each connection before removal to create a useful installation reference. The amplifier and wiring layout matter because an aftermarket radio or speaker may require different integration parts.
What are the best replacement speakers for a Ford F-150, and how much do they cost?
The best replacement depends on the speaker location, mounting fit, power handling, and whether an amplifier will drive it. Examples include 6 1/2-inch front-door speakers and 6.5-inch coaxial rear speakers rated at 80W RMS. Treat these as examples, not universal fit recommendations. Cost depends on the speakers, adapters, amplification, and installation involved; pricing is provided after a quote request.
What subwoofer and amplifier options fit in a Ford F-150 without taking up much space?
A powered subwoofer under the rear seat, paired with replacement door speakers and a four-channel amplifier, is one space-conscious option. The enclosure and truck layout determine how much storage remains accessible. Another option is a custom enclosure shaped to fit the available space. Decide which storage areas need to stay usable, then plan subwoofer placement and amplifier location together instead of choosing each component separately.