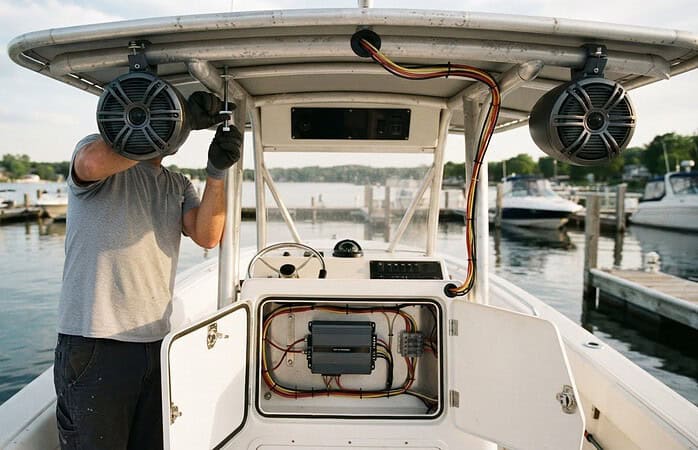
A six-channel amp isn’t automatically the simplest choice for a center console boat audio setup. For a 30-foot offshore boat, a practical layout uses a 2-channel amp rated at 50-75 watts RMS per channel for the helm and a 4-channel amp rated at 100 watts RMS per channel for the cockpit. The right configuration depends on the listening zones and speakers you want to power.
It makes sense to want one amplifier to handle everything, but splitting the system can better match power to the helm and cockpit. Subwoofer placement matters too: installing one under a seat can add bass without taking up passenger space.
We’ll explain how marine-rated components, wiring requirements, seating positions, and subwoofer placement shape a system, then outline what affects installation cost. You’ll get a clearer sense of whether a six-channel amplifier suits your boat and how a professional plans an audio setup around your listening areas.
Key Takeaways
- Learn which marine-rated components and corrosion-conscious choices help an audio system handle life aboard a boat.
- Understand the main factors that shape equipment investment and professional installation costs.
- See how speaker direction and seating layout influence clear sound across the helm and cockpit.
- Explore how a professionally planned subwoofer location can add bass while preserving passenger space.
Marine-rated audio equipment and corrosion protection
A dependable system starts with components suited to marine conditions, your boat’s listening zones, and the captain’s controls. The right combination also depends on where equipment can be mounted and how signals can be routed through the boat.
Marine Sources, Remotes, and Connectivity
A marine source unit handles audio inputs and playback, while remotes let the captain adjust controls from another listening area. A professional considers access at the helm, intended listening zones, and connections to your devices. These choices affect everyday convenience as much as speaker selection.
A complete center console system can include a source unit, speakers, amplifiers, wiring, and a subwoofer. Signal wiring matters too: shielded marine-rated RCA cables suit long runs, while unshielded RCA cables over 20 feet can pick up interference. Amplified-music restrictions depend on where the boat operates, so follow applicable local boating and shoreline restrictions.
Marine Subwoofers and Amplifiers
Amplifiers power speakers and subwoofers, so they should be matched to the system’s zones and components. Start with the boat’s layout and how you want it to sound, not simply the number of amplifier channels. The aim is a balanced system, not hardware without a clear purpose.
Marine subwoofers and amplifiers are designed for boat audio. JL Audio Marine is one product line to consider when planning components. A professional installation also accounts for signal routing and secure mounting. Poor connections can cause interference, dropouts, or corrosion-related problems, while mismatched components can leave the system sounding uneven.
Speaker Ratings and Corrosion Protection
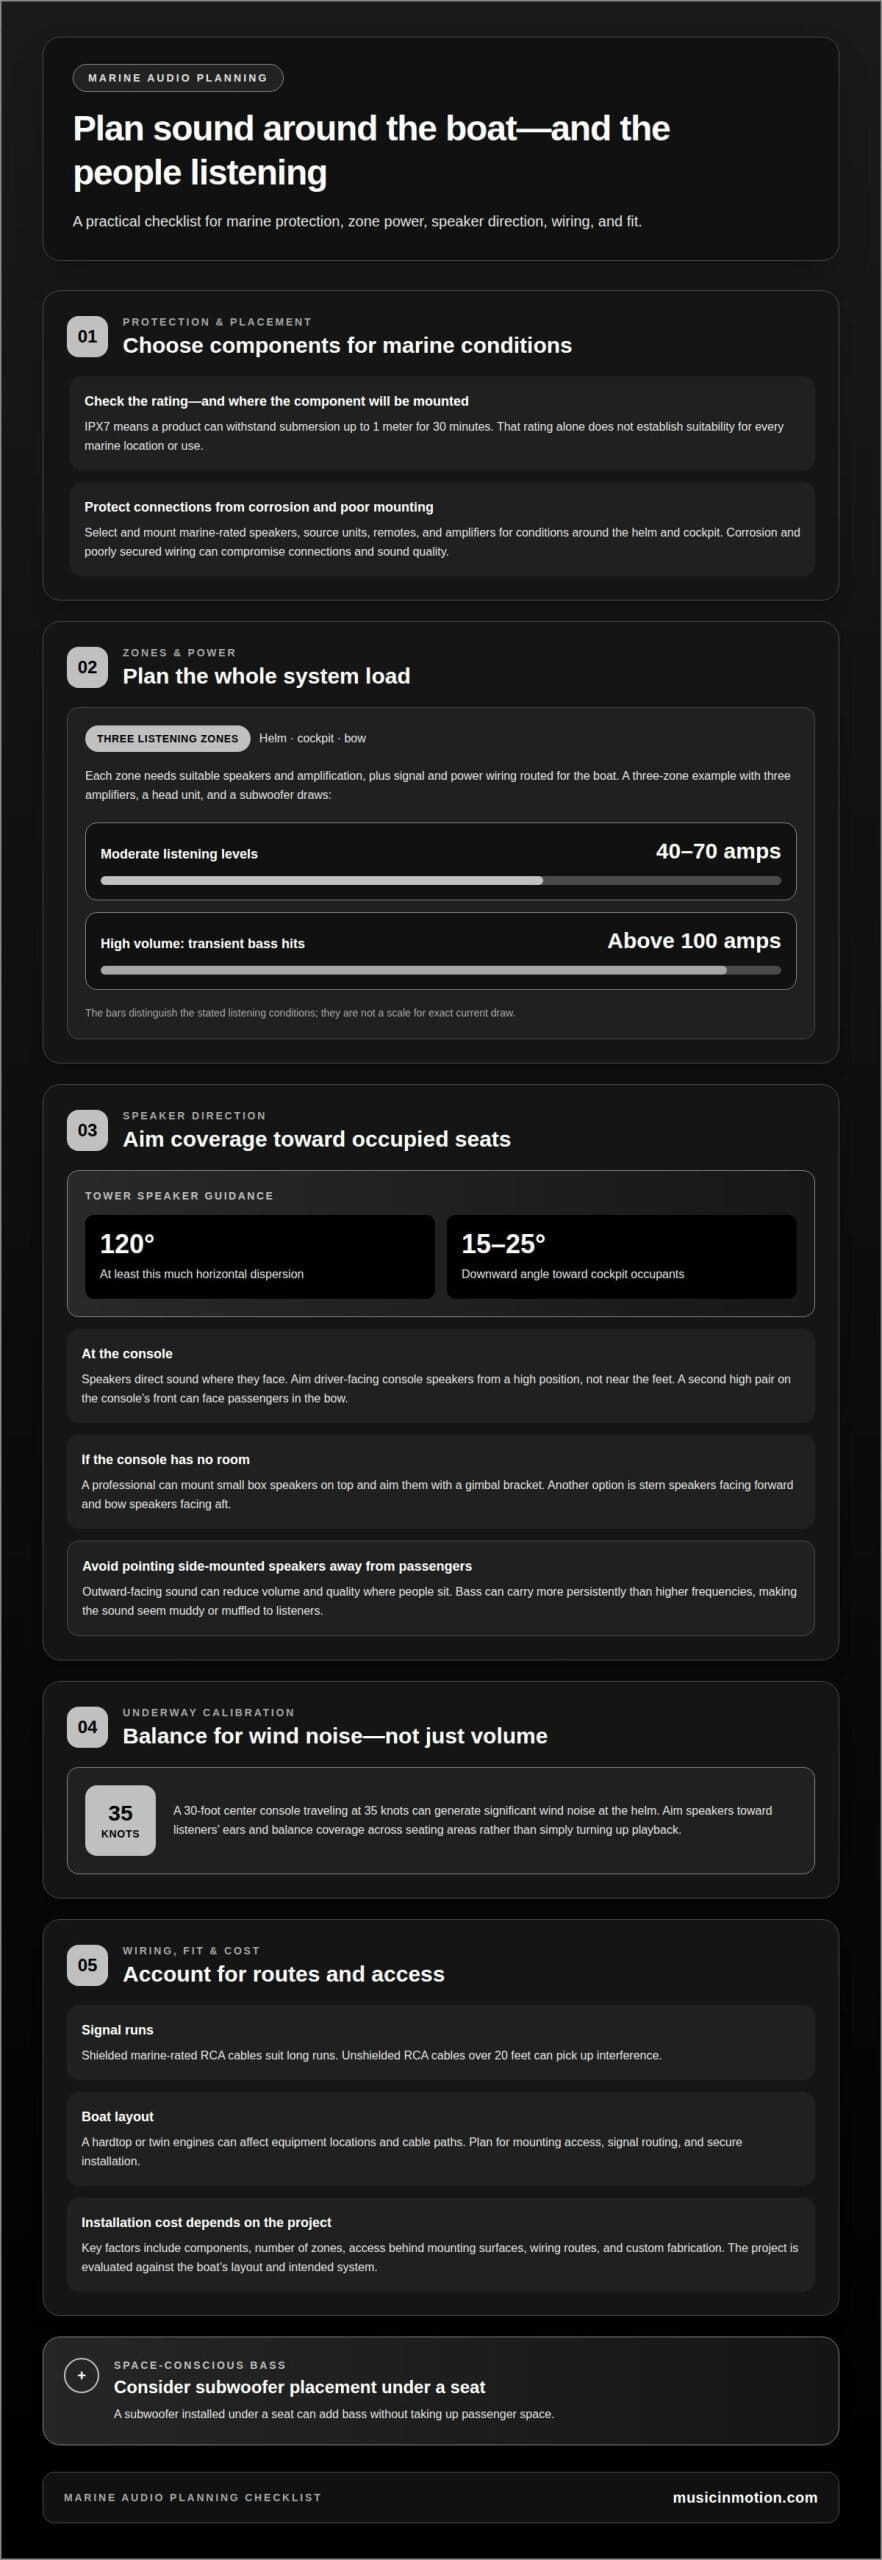
IP ratings describe protection against specific forms of water or dust exposure. An IPX7-rated product can withstand submersion up to 1 meter for 30 minutes, but that rating alone doesn’t establish suitability for every marine location or use. The component’s intended application and mounting position still matter.
Marine audio systems need equipment designed to withstand exposure and corrosion. A professional considers conditions around the helm and cockpit when selecting and mounting speakers, source units, remotes, and amplifiers. Corrosion and poorly secured wiring can compromise connections and sound quality over time. Marine-rated components, fitted appropriately, help the system suit its environment.
Premium system components and installation costs
Equipment and labor depend on the boat’s layout, listening zones, and how the system integrates. Digital controls can simplify zone selection, but their value depends on how you use the boat.
Components and installation planning
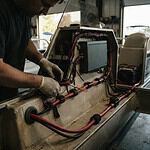
A three-zone system separates listening areas such as the helm, cockpit, and bow. Each zone needs suitable speakers and amplification, along with signal and power wiring routed for the boat. On a center console, a hardtop or twin engines can affect equipment locations and cable paths, so installation planning should account for the actual layout.
A three-zone system with three amplifiers, a head unit, and a subwoofer draws 40-70 amps at moderate listening levels. At high volume, transient bass hits can push demand above 100 amps. Those loads make system design and power planning important, rather than treating each component as a separate purchase.
Matching system scale to the boat
On a smaller boat, a compact setup can focus on a source unit and speakers, with an amplifier or subwoofer added to suit your listening goals. Prioritize a balanced system that fits available mounting locations and passenger space rather than adding unnecessary equipment.
Boats over 40 feet often need planning across more listening areas and longer cable routes. A premium setup may distribute speakers around the cockpit, bow, and hardtop, with separate controls for each zone. Digital control can simplify selecting sources and adjusting those areas from accessible positions.
What shapes installation cost
Installation cost depends on the components, number of zones, access behind mounting surfaces, wiring routes, and any custom fabrication. The price is determined by the project and provided after a quote request. A professional evaluates the boat’s layout and your intended system before recommending the work.
For a system tailored to the boat’s zones and layout, explore marine audio system planning as a practical next step.
Professional audio calibration for boat size and seating configuration
Professional calibration starts with the boat’s seating plan and where sound needs to reach. Tower speakers should have at least 120 degrees of horizontal dispersion and angle 15-25 degrees downward toward cockpit occupants.
On a center console, speakers direct sound where they face. Console-mounted speakers aimed at the driver should be positioned high rather than near the feet. A second pair mounted high on the console’s front can face forward toward passengers in the bow seating area.
How many speakers, and what size, work best? There’s no single count or size for every boat; placement should suit the seating and listening zones. If there’s no room in the console, a professional can mount small box speakers on top and aim them with a gimbal bracket. Alternatively, stern speakers can face forward and bow speakers aft.
Speaker direction matters offshore. Side-mounted speakers that face outward can reduce volume and sound quality because they point away from passengers. Bass can carry more persistently than higher frequencies, so outward-facing sound may seem muddy or muffled where people sit.
At speed, calibration should address wind noise before relying on louder playback. A 30-foot center console traveling at 35 knots can generate significant wind noise at the helm. A professional can aim speakers toward listeners’ ears and balance coverage across seating areas, rather than simply turning up the system.
For in-cockpit speakers on an offshore center console, the recommended amplifier output is at least 100 watts RMS per channel. That power helps the system serve the cockpit, while speaker aiming helps direct sound toward passengers. Together, placement and amplification shape a more even listening experience across the boat.
Professional center-console subwoofer placement
An under-seat location can add bass without using open passenger space. Because bass is less directional, a subwoofer can sit low without facing directly toward listeners. A professional still considers the console, seating, and available mounting space when choosing its position.
For an under-console installation, a compact 8-inch powered marine subwoofer is one suggested option. Its integrated amplification can suit a space-conscious layout, while the marine rating fits the boat’s environment. The final choice depends on how the subwoofer integrates with the system’s existing speakers and amplifiers.
Placement affects more than sound. On a center console, an enclosure should fit without obstructing seating or interfering with normal use of the area. Under a seat is one practical option; a professional assesses the mounting location and enclosure fit as part of the complete installation.
Subwoofer placement should work with speaker direction. Speakers aimed toward passengers deliver sound where people are seated, while bass can come from a less exposed location. For example, a subwoofer installed low beneath a seat can support listening across the cockpit without facing forward or occupying visible passenger space.
While cruising, aim for balanced bass that complements the speakers, not a location chosen only for maximum output. A professional considers seating, enclosure space, and the rest of the system together. This helps preserve usable space while integrating bass into the boat’s overall sound.
For a tailored fit beneath a seat or console, plan a custom subwoofer enclosure around the boat’s layout and listening areas.
Music In Motion
Music In Motion helps boat owners turn component choices into a complete marine audio system. We plan custom installations around the boat’s layout, listening zones, and passenger space, bringing the components together for a finished setup.
If you’re weighing amplifier configurations, speaker placement, or subwoofer location, our team can help plan a system around how you use your boat. Our Marine Audio Systems bring the setup together, while Custom Subwoofer Enclosures make bass work with available space. The right approach depends on your priorities and the boat’s layout.
If you’re ready to plan an audio system for your boat, contact Music In Motion to discuss your project.
Plan a system around your time on the water
A useful next step is to picture how you want the boat to sound during a typical day: clear conversation at the helm, music for passengers, or richer audio while anchored. Those priorities give a professional a practical starting point for planning a center console boat audio setup around your boat and how you use it.
Music In Motion brings marine audio systems and custom installations together with a finished result in mind. Its experience also spans car audio upgrades, connecting a range of audio applications with hands-on installation expertise. If you’re ready to discuss the right direction for your boat, contact Music In Motion for a setup.
A well-planned system should feel at home on your boat, from the controls you reach to the sound shared with passengers. When you’re ready, talk with Music In Motion about your setup and start shaping an audio experience that makes time aboard more enjoyable.
Frequently Asked Questions
Why Not a 6-Channel Amp?
A 6-channel amp isn’t automatically a poor choice; it works when its channels and power suit the speaker layout. A professional compares the planned zones, speakers per zone, amplifier output, and room for future expansion. One amplifier may simplify equipment placement, while separate amplifiers can offer more flexibility for zone planning. The right choice depends on the wiring plan and intended use, not channel count alone.
How does a professional choose marine speakers for a center console boat?
A professional matches marine speakers to their exposure, mounting location, physical fit, and power requirements. For example, the console opening must fit the speaker’s dimensions and mounting depth, and the amplifier must meet its power needs. The installer considers where people sit and how sound coverage changes between the helm and bow, then ensures the components work together as a system.
How does a professional wire and install a boat audio system safely?
A professional installation begins with a plan for power and signal routes, mounting surfaces, and component locations. The installer secures and protects wiring, makes connections suited to marine conditions, and seals openings where needed. Before handoff, the system is tested for clear playback, functioning controls, and operation across its intended zones. Poor routing or loose connections can cause interference or system faults.
How does a professional determine the marine audio wiring gauge, fuse, and battery capacity needed?
Wire gauge, fuse selection, and battery capacity depend on amplifier demand, cable length, and the boat’s other electrical loads. A professional uses component specifications and the planned circuit route to size the wiring and protection, then considers whether the battery bank can support the audio system alongside existing equipment. Longer runs and higher demand affect the calculation, so these decisions belong in system design.
How does a professional connect a boat stereo to Bluetooth, a phone, or a chartplotter?
Bluetooth or phone playback depends on the source unit’s supported connections. A professional pairs the source with your phone and tests playback and controls. For a chartplotter, the installer checks its audio output and the stereo’s compatible input, then routes the signal into the system. This lets the selected source feed the speakers without assuming every chartplotter or head unit uses the same connection.
How much does a center console boat audio setup cost?
The price depends on the boat and system, and is provided after a quote request. The estimate reflects the selected components, listening zones, installation access, wiring routes, and any custom fabrication. Replacing speakers has a different scope from adding amplifiers, a subwoofer, and distributed controls. A professional defines the components and installation work together so the estimate reflects the intended finished system.