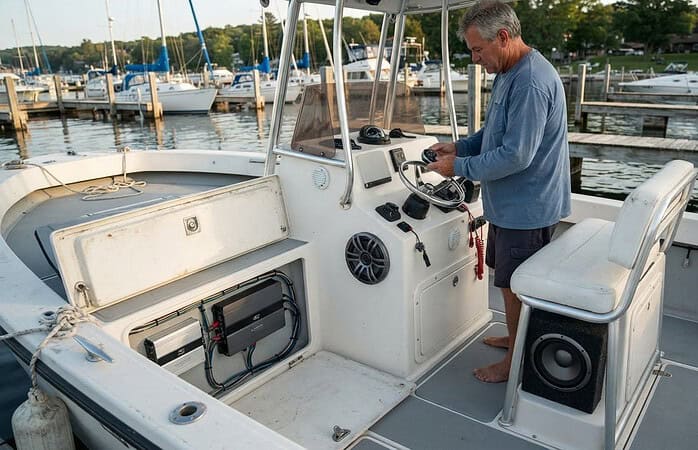
The right amplifier match matters as much as speaker placement. When installing speakers on a boat T-top, match the amplifier’s RMS output per channel to the RMS capability of each speaker it powers, and use marine-suitable wire for audio and lighting circuits. A four-channel amplifier may provide the sound you want without adding more speakers.
It’s natural to focus on speaker locations, but wiring routes and system power also shape the finished setup. T-top structures can make wire routing challenging, so plan the mounts, connections, and lighting needs together.
This guide explains how to plan speaker placement and wire routing, match amplifier output to speaker capability, and choose marine-suitable wiring for audio and lighting. A custom installation can balance clear sound, practical lighting, and a tidy finish by treating the components as one system.
Key Takeaways
- Match each amplifier channel’s RMS output to the RMS capability of the speaker it powers for a balanced system.
- Choose marine-rated wire with the audio and lighting circuits in mind, and plan a clean route through the T-top.
- Speaker fit depends on the T-top’s structure, mounting location, and the size and weight of the speakers.
- A professional installation brings mounting, wiring, and system matching together; Music In Motion offers marine audio systems and custom installations.
Marine-rated speaker and lighting wire
Plan speaker wiring and 12-volt lighting together before mounting equipment. Wire choice, frame routing, and amplifier connections all affect the finished installation.
-
How a professional chooses marine-rated wire and mounting hardware
Start by matching marine-rated wire to the speaker or lighting circuit, its electrical load, and the length of its run. For 12-volt boat lighting, plan the circuit alongside audio wiring without treating speaker wire as lighting wire. Choose clamps and brackets that fit the T-top tubing and hold each speaker securely without damaging the frame.
Assess the mounting surface, speaker weight, and intended angle before choosing hardware. Use suitable measuring and installation tools to position the speakers, and avoid fasteners that could interfere with wiring or structural members. Permit requirements depend on local rules and installation scope; applicable marine electrical standards should guide the wiring plan.
-
How a professional routes and protects wiring through the frame
Map the wire route before feeding conductors through the T-top. Running speaker wire inside the pipes can be difficult, so identify bends, access points, and existing wiring first. One practical option is routing down the right side along the factory navigation-light path, with waterproof connectors at exposed connections.
Keep speaker wiring clear of sharp edges, moving parts, and pinch points. Protect exposed sections and secure the run so vibration doesn’t pull on connections. The route should preserve access to navigation lights and avoid blocking their visibility. A professional also accounts for the T-top’s structure before deciding whether any opening is appropriate.
-
How a professional connects speakers and protects the installation
Trace each speaker lead to the marine stereo or amplifier, then connect it to the intended channel with consistent polarity across the system. Match the amplifier’s RMS output per channel to the RMS capability of each speaker it powers. That creates a properly matched system; adding speakers isn’t the only way to get fuller sound.
Use marine-suitable connections and protect them from moisture to reduce corrosion and water damage. Secure wiring and mounting hardware to limit movement and vibration underway. Consider speaker weight and placement in relation to the T-top’s support, sightlines, and navigation lights, so audio equipment doesn’t obstruct visibility or lighting.
What size and weight speakers can a boat T-top support
A professional determines fit by assessing the specific T-top, mounting points, and speaker layout. There isn’t a single size or weight that suits every frame.
- Before installing speakers on a boat T-top, assess the proposed mounting locations. Consider the tubing, joints, available surface, and how each speaker’s weight will load its mount. The boat model alone doesn’t establish what a particular T-top can support. A professional evaluates the structure and mounting arrangement before recommending a speaker size.
- Measure the available space and compare it with the speaker’s dimensions. One installation used 4-inch marine speakers inside the T-top above the console, aimed mainly downward. That example illustrates a compact placement, not a universal fit. The installer also considers mounting depth, clearance, and how the speaker sits near the console.
- Assess the whole layout rather than judging each speaker in isolation. One boat owner described four speakers, two at the rear of the T-top and two at the front, while considering two more in a storage box. That setup doesn’t establish a safe load for other boats. Consider speaker positions and their combined weight across the frame.
- Plan speaker size, orientation, and placement together. A heavier model may call for a different mounting position or support than a compact speaker. Planning for installing speakers on a boat T-top also means preserving sightlines and avoiding interference with navigation lights. Adjust the layout to the boat’s structure and intended listening area instead of assuming every T-top supports the same arrangement.
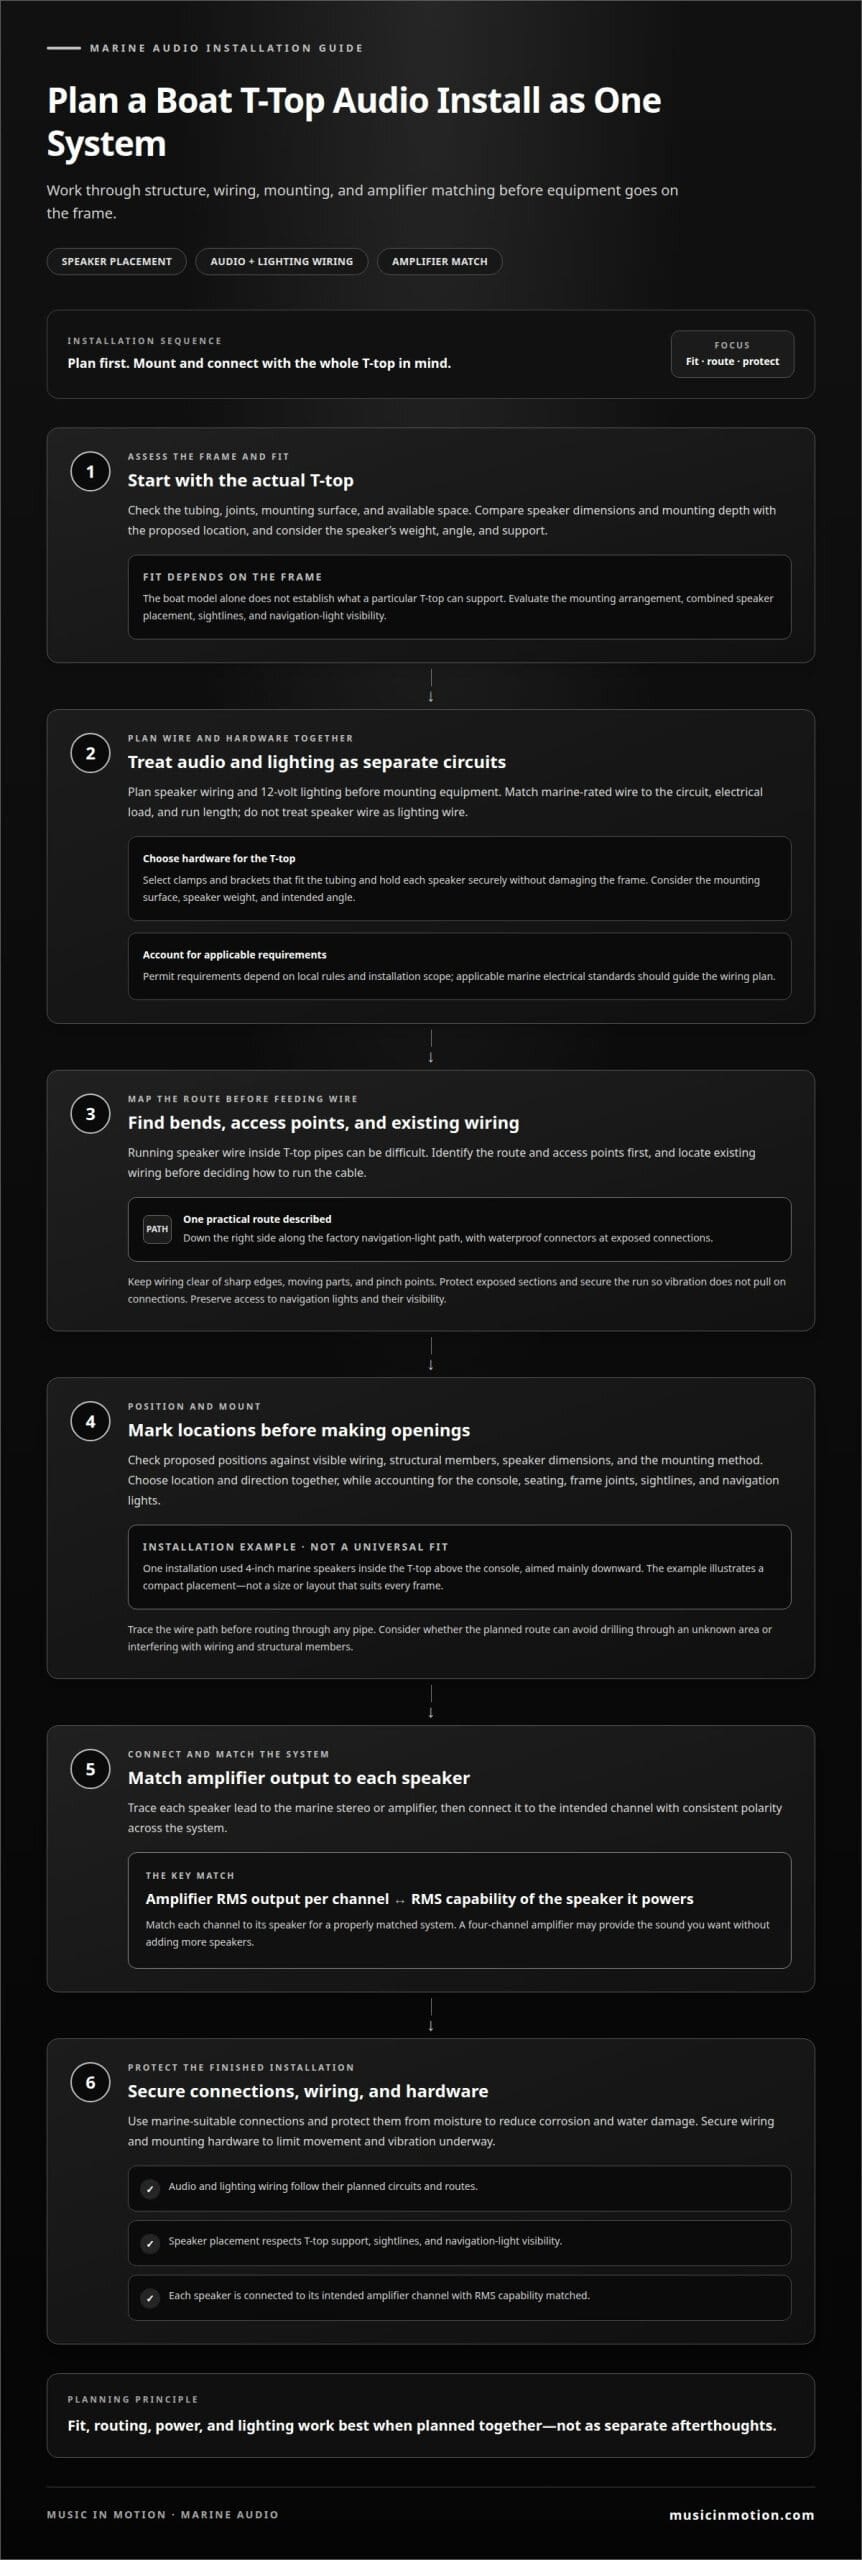
How a professional mounts speakers on a boat T-top without drilling through wiring or structural members
A professional maps speaker locations and wire routes before mounting anything. On one installation, 4-inch Kicker marine speakers sat inside the T-top above the console, aimed downward.
- Inspect the T-top and mark proposed speaker positions before making openings. Locate visible wiring, including navigation-light wiring, and identify frame members that must remain undisturbed. A professional checks each position against the speaker’s dimensions and mounting method. The 4-inch Kicker example shows one compact option above a console, not a universal fit for every T-top.
- Choose the speaker direction and location together. Speakers aimed downward can direct sound toward the cockpit, as in the above-console example. Consider the console, seating, visibility, and navigation-light placement before finalizing the position. A professional also checks whether the speaker and bracket fit without crowding adjacent equipment or placing pressure on a frame joint.
- Trace a wire path before routing cable through any T-top pipe. Running wire inside the pipes can make installation difficult, so identify the route and access points first. One documented approach follows the factory navigation-light route down the right side. Waterproof connectors were used in that installation, keeping the route aligned with existing wiring.
- Use the planned route to determine whether drilling the frame can be avoided. Consider running wire alongside the frame, secured with suitable mounting hardware, rather than making an opening through an unknown area. The right-side navigation-light route is one example, not a required path for every boat. Keep wiring clear of sharp edges and pinch points, and avoid disturbing structural members.
- Review the placement before securing the installation. Confirm that the speakers point toward the intended listening area and don’t block navigation lights or sightlines. Check that connectors and wire runs are protected along the chosen route. A careful final inspection brings speaker position, frame clearance, and cable routing together without relying on an unplanned hole.
What tools and hardware does a professional use to install speakers on a boat T-top?
- Begin with measuring tools and a visual inspection of the T-top. Record tube dimensions, available mounting space, and speaker positions before selecting hardware. An inspection light can help reveal accessible wiring and obstructions. These checks guide tool and bracket choices instead of assuming every boat frame has the same layout.
- Choose clamps or mounting brackets that fit the frame and speaker. Check bracket alignment, fastener access, and how the speaker will sit once secured. A correctly matched bracket supports the chosen position without relying on an improvised fit. Select hardware with the intended speaker angle and nearby equipment in mind.
- Use fastening tools suited to the selected hardware. A driver can secure compatible fasteners, while hand tools help control alignment during fitting. Avoid forcing a fastener into a poor angle or placing pressure on a frame joint. The exact tools depend on the bracket, clamp, and mounting method.
- Prepare separate wire-handling tools for the audio and lighting runs. Wire cutters, strippers, and a crimping tool help prepare conductors and connections cleanly. A wire-pulling tool can assist with a planned route through an accessible frame section. The installer keeps speaker leads distinct from 12-volt lighting wiring.
- Set out connection and protection hardware before final assembly. Waterproof connectors suit exposed wiring connections, while wire supports help keep a run positioned along its route. The professional checks that each connector matches the wiring and location. Unsecured cable can shift against the T-top during boat movement, so routing and restraint matter.
- Finish with a fit and function inspection. Confirm that the mounting hardware holds each speaker in its intended position, then check the stereo or amplifier connection. Review cable clearance, connector protection, and access to navigation lights. This final check can catch alignment or routing issues before the installation is complete.
Music In Motion
Music In Motion brings your T-top audio plan together in a coordinated marine installation. Its marine audio systems and custom installations bring speaker placement, wiring routes, and amplifier matching together as one finished setup.
Describe the sound and lighting you want and share details about your boat. That gives the installation team a starting point for considering the T-top structure, speaker locations, wire routing, and system components as a whole. If you’re weighing speaker placement or an amplifier match, professional guidance can help shape a practical plan for your boat.
Contact Music In Motion to discuss a custom marine audio installation for your boat.
Plan the next step for your boat’s sound
A T-top audio system should feel like part of the boat, not an add-on that dictates how you use it. If you’re considering installing speakers on a boat T-top, start by picturing the result you want: music across the cockpit, a clean installation, or audio that works alongside other upgrades. That goal gives the installation plan a clear direction.
Music In Motion combines marine audio systems and custom installations with expertise in vehicle audio, including car audio upgrades. The focus is on shaping the work around the boat and the finished result, rather than choosing components in isolation. Share what you want your setup to do and discuss an installation that fits your plans.
Contact Music In Motion for installation help and take the next step toward a boat audio system that suits your time on the water.
Frequently Asked Questions
How does a professional choose marine speakers for a boat T-top?
Select marine speakers based on the boat’s listening area, existing audio system, and exposure to the marine environment. For example, speakers aimed toward cockpit seating may suit a different listening plan than speakers intended to reach across an open deck. Also consider how the speakers will connect to the stereo or amplifier, so the components work as a coordinated system.
What are the best clamps and mounting brackets for T-top boat speakers
Choose clamps or brackets sized for the T-top tubing and speaker, and suited to the speaker’s weight and intended angle. Check that they hold the speaker securely without damaging the frame or interfering with wiring or structural members.