Music is an essential part of any boating experience. Whether cruising on the lake, fishing on the bay, or enjoying the sun and the water, having a quality marine audio system can make a huge difference. But installing marine audio can be intimidating, especially if you’re unfamiliar with the process. That’s why we’ve put together this comprehensive guide on how to install marine audio. We’ll walk you through everything you need to know, from choosing the right equipment to wiring and mounting. So whether you’re a seasoned boater or a first-time installer, this guide is for you.

When installing a marine audio system, choosing the right equipment is crucial. Marine environments can be harsh, with exposure to water, salt, and sun, so it’s important to choose equipment that can withstand these conditions. Here are some things to consider when selecting marine audio equipment:
Marine-rated: Make sure all equipment is specifically designed and rated for marine use. This ensures that it can withstand the harsh conditions of the marine environment, including exposure to water, salt, and sun.
Size and power: Consider the size and power of your boat when selecting your equipment. A larger boat will require more powerful speakers and an amplifier, while a smaller boat may only need a basic head unit and speakers.
Features: Look for features to enhance your boating experiences, such as Bluetooth connectivity for wireless streaming, waterproof remote controls, and USB ports for charging your devices.
Brand reputation: Choose equipment from reputable brands known for their quality and reliability. This will ensure you get a product that will last and perform well.
Budget: Finally, consider your budget when selecting your equipment. While it’s important to choose high-quality marine-rated equipment, you don’t want to overspend and compromise your boating budget.
Considering these factors, you can choose the right marine audio equipment for your boat and enjoy high-quality sound on the water.
Before you start installing your marine audio system, it’s important to prepare your boat for the installation process. This will help ensure a smooth and safe installation, and will also help prevent any damage to your boat or equipment. Here are some steps you should take to prepare for installation:
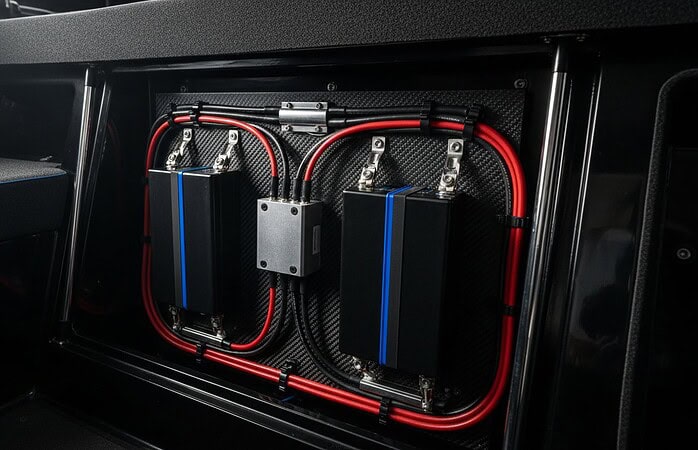
Assess your boat’s electrical system: Before installing any new equipment, you should assess it to ensure it can handle the added load. Make sure your battery is in good condition and that your boat’s wiring is in good shape.
Prepare your boat for installation: Before you begin the installation, remove any existing audio equipment from your boat. Clean the area where you will be installing your new equipment and make sure it’s dry.
Gather the necessary tools and supplies: Ensure you have all the tools and supplies you’ll need for the installation process. This may include wire strippers, crimpers, connectors, screws, and mounting hardware.
By taking these steps, you’ll be well-prepared for the installation process and can avoid any unexpected issues or damage to your boat or equipment. It’s always a good idea to consult the instruction manual for your specific equipment, as it may have additional preparation or installation instructions.
Wiring your marine audio system is a crucial step in the installation process, and it’s important to take the time to do it right. Here are some steps to follow when wiring your marine audio system:
Wiring basics: Before you start wiring your system, it’s important to understand some basic wiring principles. Always use marine-grade wiring and connectors, and properly ground your system. Keep your wiring neat and organized to avoid any electrical interference.
Wiring your head unit: The head unit is the control center of your audio system, and it’s important to wire it correctly. Follow the instructions for your specific head unit, but in general, you’ll need to connect the power, ground, and speaker wires. You may also need to connect additional inputs or outputs, such as Bluetooth or USB.
Wiring your amplifier: If you’re using an amplifier to power your speakers, you must wire it correctly. Follow the instructions for your specific amplifier, but in general, you’ll need to connect the power, ground, and speaker wires. You may also need to connect additional inputs or outputs, such as RCA cables.
Wiring your speakers: Finally, you’ll need to wire your speakers. Make sure to connect the positive and negative wires to the correct terminals on the speakers, and use marine-grade wiring and connectors. If you’re using an amplifier, connect the speakers to the correct channels on the amplifier.
Grounding your system: Once you’ve wired everything, it’s important to ground your system properly. This will help prevent any electrical interference and ensure that your system works properly. Follow the instructions for your specific equipment, but in general, you’ll need to connect the ground wire to a metal part of your boat’s hull.
Following these steps, you can wire your marine audio system correctly and ensure it works properly on the water. It’s always a good idea to double-check your wiring and test your system before hitting the water.
Mounting your marine audio system is an important step in the installation process, as it ensures that your equipment is securely attached to your boat and protected from water damage. Here are some steps to follow when mounting your marine audio system:
Mounting your head unit: The head unit should be mounted in a location that’s easily accessible and provides good visibility. Make sure to use a marine-rated mounting bracket and screws, and use a silicone sealant around the edges of the bracket to prevent water from getting inside.
Mounting your amplifier: If you’re using an amplifier, it should be mounted in a location that’s dry and well-ventilated. Make sure to use a marine-rated mounting bracket and screws, and use a silicone sealant around the edges of the bracket to prevent water from getting inside.
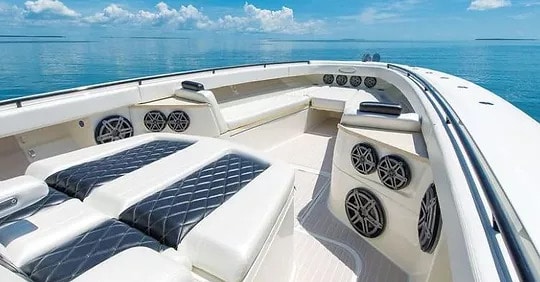
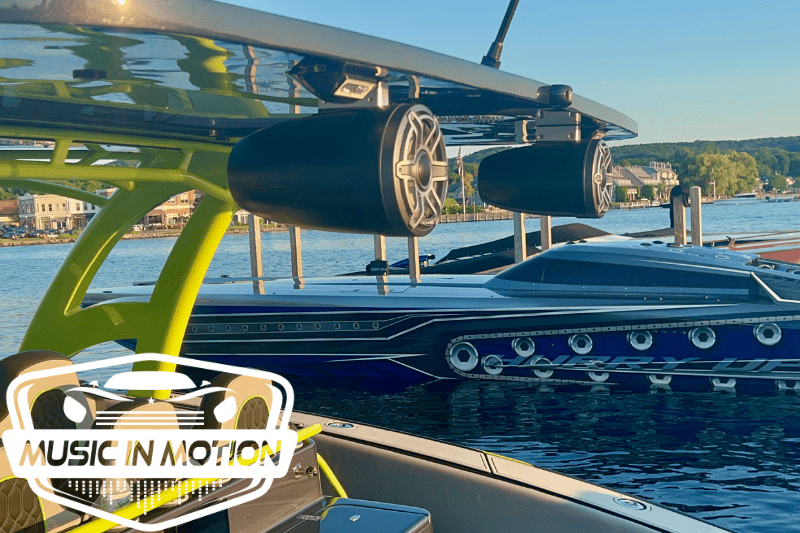
Mounting your speakers: Speakers should be mounted in a location that provides good sound quality and protection from water damage. Use marine-rated mounting hardware and silicone sealant to protect the wiring and connections.
Hiding your wiring: Once everything is mounted, you’ll need to hide your wiring to prevent any electrical interference and ensure a neat appearance. Use cable ties and wire loom to organize and protect your wiring, and keep it away from any moving parts or heat sources.
Following these steps, you can ensure your marine audio system is securely mounted and protected from water damage. It’s always a good idea to double-check your mounting and wiring before hitting the water and to test your system thoroughly to ensure it’s working properly.
Even with the most careful installation, sometimes things can go wrong with your marine audio system. Here are some common issues that you may encounter and how to troubleshoot them:
No sound or distorted sound: If you’re not getting any sound or the sound is distorted, the first thing to check is your wiring. Make sure that all connections are secure and that the wiring is not damaged. Also, check your head unit settings to ensure that the correct input is selected and that the volume is turned up.
Electrical interference: If you’re experiencing electrical interference, such as static or humming, it’s likely caused by a problem with your wiring. Make sure that your wiring is properly grounded and that you’ve used marine-grade wiring and connectors. Also, ensure your wiring is not too close to any other electrical equipment on your boat.
Poor reception: If you’re experiencing poor reception on your radio, it may be due to a weak signal or a problem with your antenna. Check your antenna to ensure it’s properly installed and that there are no kinks or breaks in the wiring. You may also want to try repositioning your boat to improve the signal.
If you’re still experiencing issues with your marine audio system after troubleshooting, it may be time to consult a professional. A qualified marine audio installer can help diagnose and fix any issues with your system to ensure you get the best sound quality on the water.

A: No. Car audio equipment is not designed to withstand the harsh marine environment and can be dangerous if used in a boat.
Do I need an amplifier for my marine audio system?
A: It depends on the size of your boat and the power of your speakers. A larger boat or speakers may require an amplifier to ensure optimal sound quality.
Can I install my marine audio system myself?
A: Yes, but it’s important to have a basic understanding of wiring and electrical systems. If you’re not comfortable with the process, it’s best to hire a professional installer. (Elite Restomods is the nation’s premier classic car dealer, and they use Music In Motion for all their audio designs and installs.)

Installing a marine audio system can be a bit daunting, but with the right equipment and a bit of know-how, it’s a manageable task. Whether you’re a seasoned boater or a first-time installer, this guide should provide all the information you need to get your system up and running. Just remember to choose marine-rated equipment, use proper wiring and mounting techniques, and test your system thoroughly before hitting the water.
With a little effort, you’ll be enjoying your favorite tunes on the water in no time. Music In Motion is your one-stop shop for all your marine audio needs. From marine-rated equipment to professional installation services, we’ve got you covered. Contact us today to learn how we can help you create the perfect sound system for your boat.