“Max Power” ratings on an audio box are often little more than creative marketing, and following them is the fastest way to smoke a perfectly good voice coil. We’ve seen many enthusiasts feel paralyzed by the fear of damaging their gear or getting lost in a sea of confusing wiring diagrams. We’re here to help you understand how to match subwoofer and amplifier using the latest 2026 technical standards so your investment stays safe. It’s a common hurdle, but building a world-class system shouldn’t feel like a high-stakes math exam. We want you to feel the impact of every beat without the smell of burning electronics.
In this definitive guide, we’ll show you how to master the synergy between RMS wattage and impedance while learning why the new ANSI/CTA-2006-D certification is your best friend when choosing hardware. We’ll break down the math behind the match so you can buy with confidence and get back to what matters most: the feeling of being behind the wheel with a system that hits exactly the way it should. We’ll cover everything from Class D efficiency to complex OEM integration to ensure your audio is loud, clear, and built to last.
Key Takeaways
- Learn why RMS is the only rating you should trust to protect your equipment and why “Peak Power” is often just a marketing gimmick.
- We break down the technical steps on how to match subwoofer and amplifier by balancing impedance loads to unlock maximum performance without overheating.
- Discover the “75% to 150% rule” for power matching and how creating headroom delivers dynamic, high-fidelity bass.
- See how custom enclosures and different environments, like marine or powersports, change the way your hardware handles power.
- Master the final tuning process by learning to set gains correctly with a digital multi-meter to prevent clipping and distortion.
The Foundation of Bass: Understanding RMS vs. Peak Power
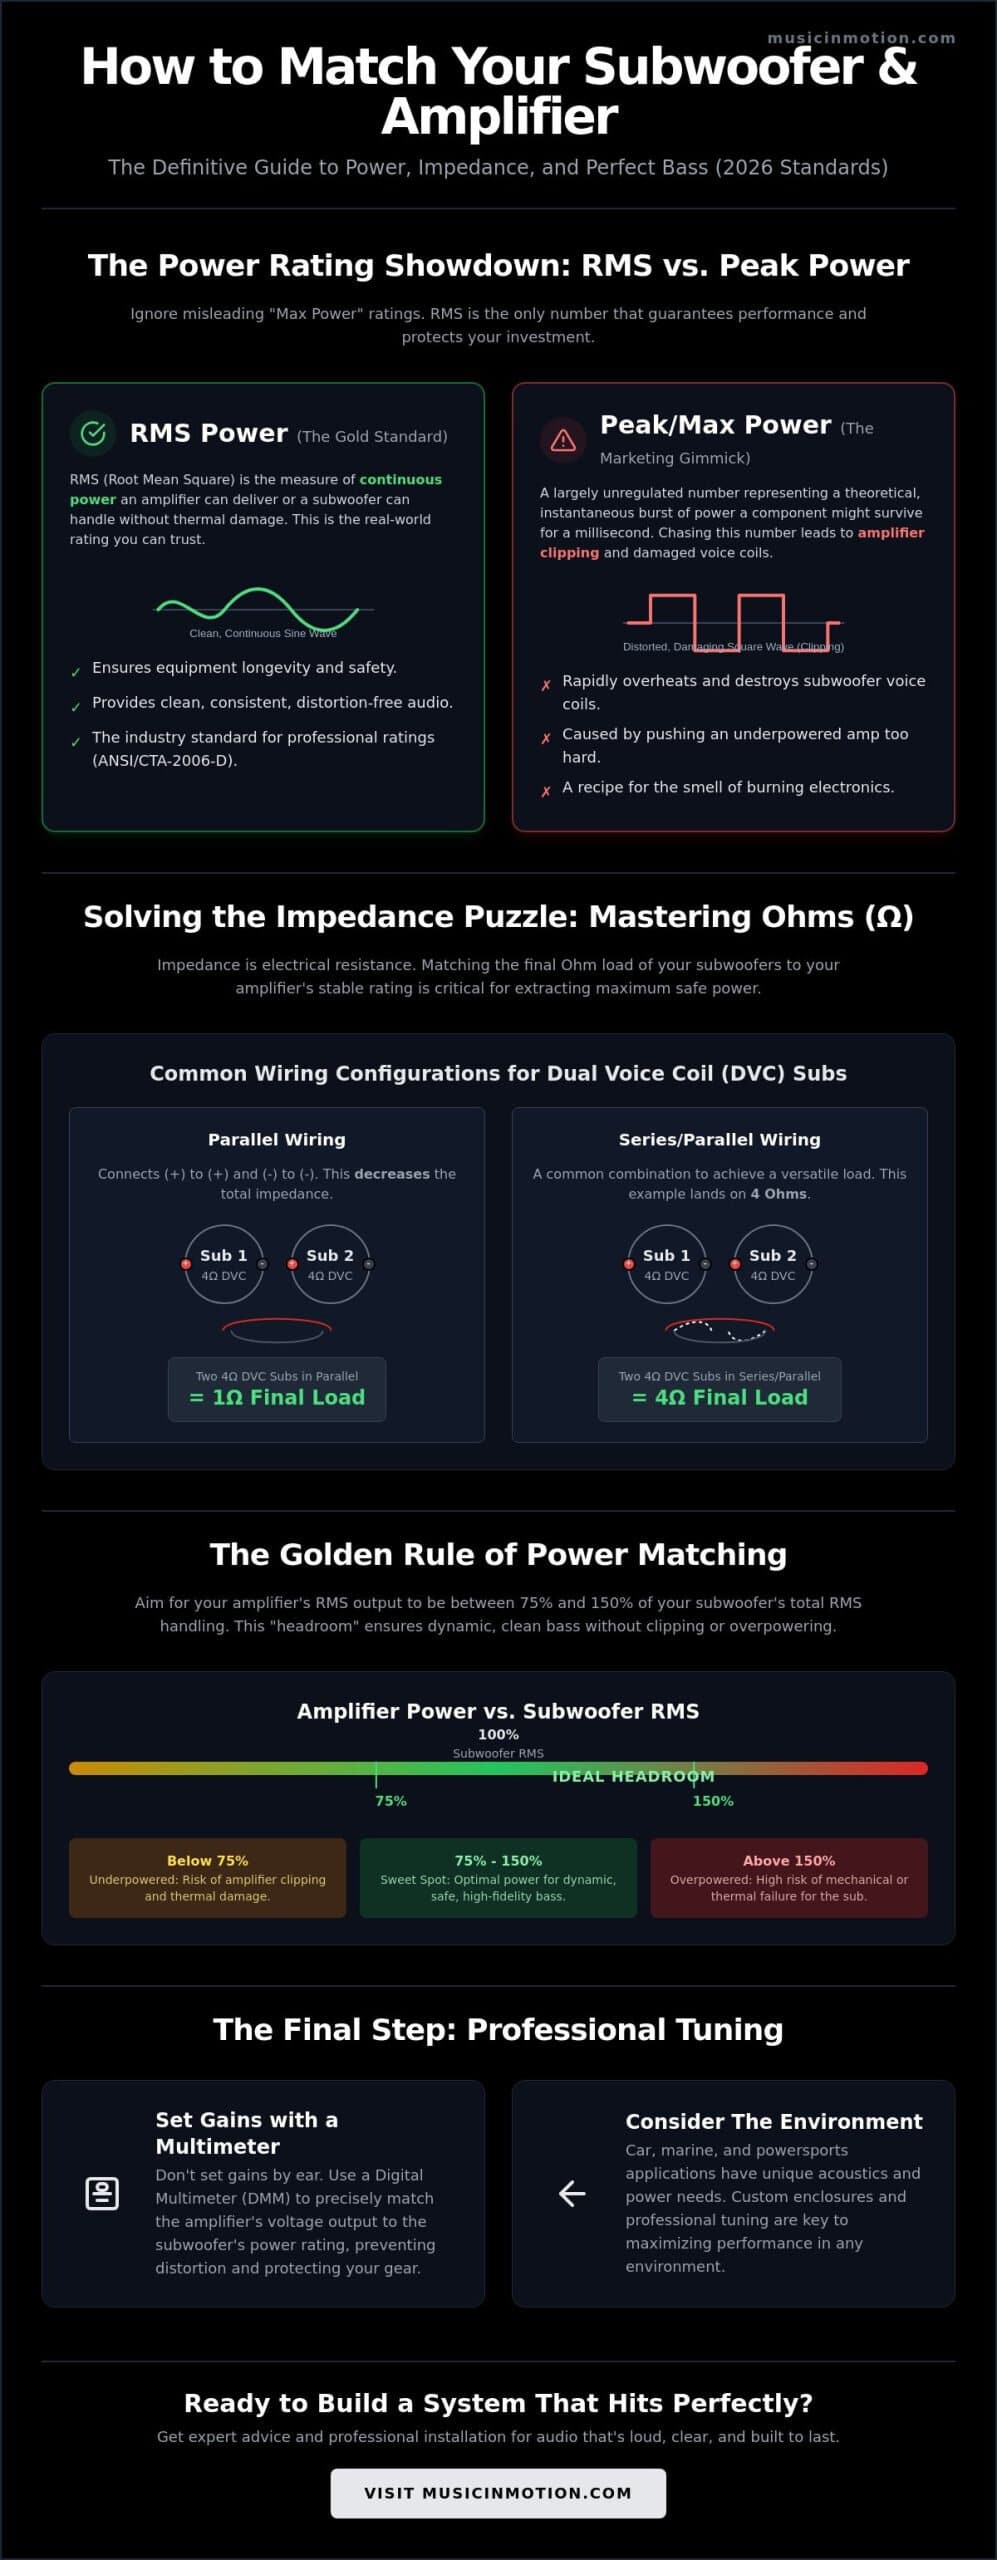
When you start looking at how to match subwoofer and amplifier, the first things you’ll see are flashy numbers on the packaging. Marketing departments love “Max Power” because big numbers sell boxes. However, if you want a system that lasts longer than a week, you need to ignore the flash and focus on the math. We always tell our customers that RMS is the only number that tells the truth about what your gear can handle day in and day out. It’s the difference between a reliable daily driver and a system that performs beautifully and one that ends up in the scrap heap.
RMS stands for Root Mean Square. It represents the actual work being done by the electrical signal. To understand the difference between RMS and Peak, think of a standard incandescent lightbulb. It generates light, but it also generates heat. If you push too much energy through it, that heat eventually melts the filament. Your subwoofer’s voice coil works exactly the same way. It needs to stay within a specific thermal range to function. When we look at Audio power explained, we see that RMS is the effective value of the waveform. Matching by RMS ensures your amplifier provides clean energy that won’t cook your sub.
Why RMS Is the Gold Standard for Audio
Every subwoofer has a voice coil that turns electrical energy into movement. This process creates significant heat. High-quality manufacturers use rigorous testing to determine how much heat a coil can dissipate over several hours. This is the RMS rating. While Peak power is often just a theoretical burst lasting a fraction of a second, RMS is the real-world standard. RMS power is the continuous energy a component can handle without thermal failure. We prioritize this metric because it guarantees reliability during those long summer drives where the music never stops. It’s about performance you can count on, not just a number on a sticker.
The Dangers of Following “Max Power” Ratings
The biggest myth in car audio is that a 1000-watt “Max” amplifier is better than a 500-watt RMS amplifier. It isn’t. In fact, following “Max Power” ratings often leads to amplifier clipping. When an underpowered amp is pushed to its absolute limit to reach a “Max” number, it stops producing a smooth wave and starts sending “square waves.” These distorted signals hold the subwoofer coil in one place for too long, causing it to overheat rapidly. Ironically, an underpowered amplifier is often more dangerous than an overpowered one. You can spot budget-tier “fake” ratings easily; if a tiny amp claims 2000 watts but has a single 20-amp fuse, the math simply doesn’t add up. Learning how to match subwoofer and amplifier correctly means looking past these inflated numbers to find the true continuous power capacity.
Solving the Impedance Puzzle: Matching Ohms and Wiring
Impedance is often the most intimidating part of learning how to match subwoofer and amplifier, but it doesn’t have to be. Think of impedance as the electrical resistance your amplifier encounters. Measured in Ohms, this number determines how much work your amplifier has to do to push power through the system. Generally, lower resistance allows the amplifier to output more wattage. However, every piece of hardware has a limit. If you force an amplifier to work against too little resistance, it will overheat or enter protect mode. We want to avoid that at all costs.
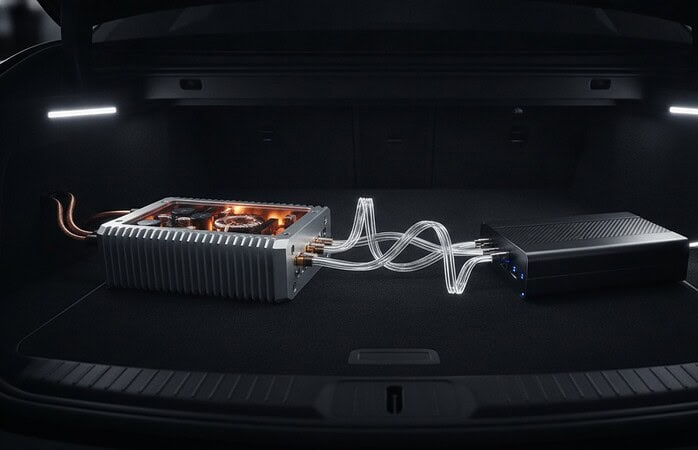
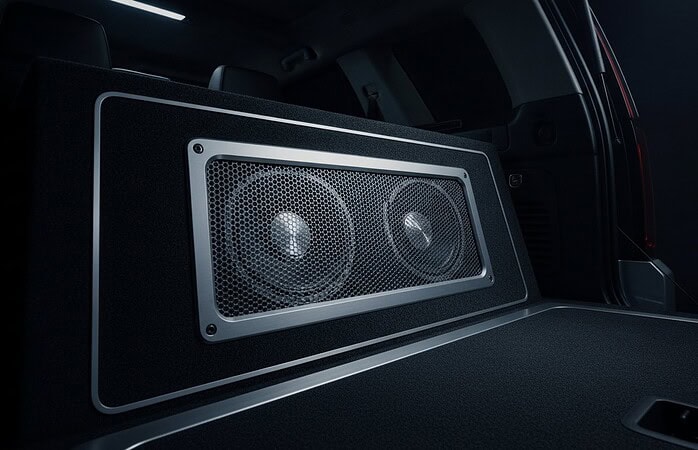
Before you choose your gear, you need to understand the difference between Single Voice Coil (SVC) and Dual Voice Coil (DVC) subwoofers. An SVC sub has one set of positive and negative terminals. A DVC sub has two. DVC subs don’t necessarily sound better than SVC models, but they offer the wiring flexibility needed to reach your amplifier’s sweet spot. We often use DVC configurations in our custom installations to ensure we’re pulling the maximum safe power from the system without stressing the internal components.
Parallel vs. Series Wiring Explained
There are two primary ways to wire your speakers: parallel and series. Parallel wiring involves connecting all the positive terminals together and all the negative terminals together. This method drops the total impedance. For example, wiring two 4-Ohm subwoofers in parallel creates a 2-Ohm load. Conversely, series wiring connects the positive of one sub to the negative of the next, which increases the total resistance. Understanding these paths is essential to determining the final load your amplifier will actually drive. If you don’t calculate this final impedance first, you risk buying an amplifier that can’t safely handle your speakers.
Choosing the Right Ohm Load for Your Amp
Most modern monoblock amplifiers are 1-Ohm or 2-Ohm stable. This means they can safely operate at those specific resistance levels. Running an amp at 1-Ohm draws massive amounts of current and generates significant heat. This setup requires high-quality wiring and a strong vehicle electrical system to stay reliable. If you’re using a 2-channel or 4-channel amp in “Bridge” mode, keep in mind that the minimum stable impedance usually changes. A 2-Ohm stable multi-channel amp typically requires a 4-Ohm load when bridged. Knowing how to match subwoofer and amplifier means respecting these limits to ensure your music stays loud and your equipment stays cool. We always recommend checking your amplifier’s manual for its “minimum stable impedance” before finalizing your wiring plan.
Calculating the Ideal Power Match and Headroom
Finding the perfect balance between your components isn’t about hitting a single number. It’s about creating a range where your equipment can breathe. When we teach enthusiasts how to match subwoofer and amplifier, we use the 75% to 150% rule. This means if your subwoofer is rated for 500 watts RMS, you should look for an amplifier that delivers between 375 and 750 watts RMS at your final impedance. This range provides the flexibility needed to ensure the system stays within its safe operating limits while still delivering the impact you expect from a high-quality car audio upgrade.
If you’re running multiple subwoofers, the math stays simple but critical. You must sum the RMS ratings of every driver in the array. Two 300-watt subwoofers require a total system RMS target of 600 watts. We always prefer using a slightly larger amplifier running “cool” over a small amplifier pushed to its absolute limit. In 2026, high-efficiency Class D amplifiers make this easy, as they often reach 90% efficiency. A larger amp operating at 60% capacity stays efficient and generates less heat than a budget unit struggling at 100%. This thermal management is the key to longevity, especially in demanding environments like marine audio systems or powersports audio systems.
The Case for 150% Headroom
Music is dynamic. It isn’t a steady, flat sound; it’s full of sharp peaks and heavy bass drops that require sudden bursts of energy. Headroom is the extra power your amplifier has in reserve to handle these peaks without distorting. When your amp has 150% of the required RMS, it can reproduce those massive kick drums cleanly. Headroom is the difference between a stressed system and one that performs effortlessly. It prevents signal clipping during the most intense parts of a track, keeping your audio crisp and your hardware safe. We always look for that extra cushion to ensure your custom installations sound as good at high volume as they do at low volume.
Avoiding the “Underpower” Trap
Many people believe that using a small amplifier is “safer” for their subwoofers. This is a dangerous misconception. A 200-watt amplifier can easily kill a 500-watt subwoofer if it’s pushed into clipping. When an amp clips, it sends a distorted signal that carries DC voltage. This heat fries voice coils faster than pure, clean wattage ever could. You’ll know you’re in the underpower trap if you notice a distinct “burnt” smell, excessive heat from the dust cap, or “mushy” bass that lacks definition. We focus on clean power because distortion is the true enemy of every custom installation. Using an amp that meets or slightly exceeds your sub’s needs is the best way to keep your gear in peak condition.
Matching Gear for Car, Marine, and Custom Applications
The environment where you listen is just as important as the specs on the box. In a standard vehicle, the interior acts as a natural resonator, often called “cabin gain.” This helps the bass sound louder with less effort. However, when we move to the water or the open road, those rules change. Learning how to match subwoofer and amplifier for these specific scenarios is the difference between a system that gets lost in the wind and one that commands attention. We focus on the environment first so the hardware can do its job effectively.
The Impact of Custom Enclosures on Power Handling
Custom enclosures change how a subwoofer reacts to electrical energy. A sealed box provides a pocket of air that acts like a spring, helping the subwoofer cone return to center. This adds mechanical power handling, allowing the sub to potentially take slightly more than its rated RMS. In contrast, a ported box relies on the tuning of the vent to control the woofer. If you use a ported box, you must match your amplifier’s subsonic filter to the box tuning to prevent the woofer from over-extending. We believe that car audio fabrication is the missing link in power matching. A box that is too small for the woofer will require more wattage to move the cone, while a box that is too large might cause the woofer to bottom out even at lower power levels.
Marine and Powersports Power Requirements
Marine environments are notoriously difficult for audio. Without a cabin to trap the sound waves, bass energy simply disappears into the open air. To overcome engine noise and wind, we often match premium marine audio systems with higher RMS amplifiers than we would for a typical car setup. Efficiency is the priority here. Powersports vehicles and RVs often have limited charging systems that can’t handle massive current draws. We utilize high-efficiency Class D amplifiers because they deliver maximum output with minimal draw on your battery. This ensures you get the deep bass you want without putting undue stress on your vehicle’s alternator.
Modern factory systems are more complex than ever. You can’t just swap a head unit in a late-model truck or luxury sedan without affecting dozens of other features. We use specialized DSP (Digital Signal Processor) amplifiers to integrate with these OEM systems. These processors accept high-level inputs and flatten the factory EQ, allowing us to match your new sub and amp perfectly to the existing electronics. If you’re ready to see what’s possible for your specific ride, contact our team for a custom installation quote today and let’s build something incredible together.
The Final Step: Gain Setting and Professional Tuning
You’ve done the heavy lifting. You know how to match subwoofer and amplifier by the numbers. Now comes the most critical part: the handshake between your source unit and your amplifier. Many people mistake the “Gain” or “Sensitivity” knob for a volume control. It isn’t. The gain control matches the amplifier’s input stage to the output voltage of your head unit. If you turn it too high, you force the amplifier to produce more power than its internal components can cleanly handle. This leads to clipping, which is the number one killer of subwoofers. We want to ensure your system stays in the safe zone while delivering maximum impact.
Setting Gains Like a Pro
Forget setting your system by ear. While some enthusiasts claim they can hear distortion, your ears are often too slow to catch the micro-clipping that destroys voice coils. We use a Digital Multi-Meter (DMM) for precision. The math is simple: take your target RMS wattage, multiply it by the impedance (Ohms), and find the square root of that number. This gives you your target AC voltage. For a 500-watt sub at 2 Ohms, your target is approximately 31.6 volts. Play a 50Hz test tone at about 75% of your head unit’s max volume and turn the gain until the DMM hits that target voltage. This ensures you’re getting every bit of performance you paid for without crossing into the danger zone. Whatever you do, stay away from the “Bass Boost” button. It’s an artificial EQ spike that creates immediate clipping and excessive heat.
Crossovers and Protection
Protection isn’t just about electrical limits; it’s about mechanical ones too. A Low Pass Filter (LPF) should usually be set around 80Hz to ensure your sub only plays the deep notes it was designed for. If you’re using a ported enclosure, a subsonic filter is mandatory. It cuts off the ultra-low frequencies that the box can’t control, preventing the woofer from physically tearing itself apart. We also check phase alignment. If your bass feels like it’s coming from the trunk rather than the front of the vehicle, your sub might be out of phase with your door speakers. Flipping the phase switch can often pull the soundstage forward, making the bass feel like it’s hitting you right in the chest.
Even with the best tools, every vehicle cabin has unique acoustic challenges. Reflections and standing waves can make a perfectly matched system sound thin or boomy. This is where professional car audio tuning becomes your final insurance policy. We use real-time analyzers and specialized DSPs to smooth out these peaks and valleys. It’s the final touch that transforms a collection of high-end hardware into a cohesive listening experience. You’ve invested in the best gear; let’s make sure it performs the way it was engineered to.
Take the Guesswork Out of Your Next Upgrade
Building a high-performance audio system is about more than just picking parts off a shelf. It’s about understanding the technical synergy between every component. We’ve covered the essentials of RMS power, the complexities of impedance, and why professional gain setting is the final step in protecting your investment. Mastering how to match subwoofer and amplifier ensures that your music sounds clean and loud while keeping your gear safe from thermal failure. Whether you’re upgrading a daily driver or a luxury marine vessel, the right math leads to the right results—a philosophy shared by a high-end integrator like PREMIERE SYSTEMS DESIGN in the world of smart home automation.
With over 30 years of custom audio fabrication expertise, we’ve mastered the art of car, marine, and powersports integration. We don’t just sell hardware; we deliver finished results that improve your daily life behind the wheel or on the water. Our professional-grade tuning provides the final layer of protection for maximum equipment longevity. Let the experts at Music In Motion design your perfect bass system and experience the difference that specialized knowledge makes. We’re ready to help you push creative boundaries and build a system that hits exactly the way you’ve always imagined.
Common Questions About Matching Subs and Amps
Can I use an amplifier with more RMS than my subwoofer is rated for?
Yes, it’s actually safer to use an amplifier with a higher RMS rating than your subwoofer can handle. We often recommend having about 150% of the sub’s RMS rating available to provide clean headroom. This prevents the amplifier from working too hard and sending a distorted signal. As long as you set your gains correctly, a more powerful amp delivers cleaner, more dynamic bass without the risk of clipping.
What happens if I underpower my subwoofer?
Underpowering itself doesn’t damage a subwoofer, but the distortion caused by pushing a small amp too hard certainly will. When you try to get more volume out of an underpowered unit, the signal clips and turns into a square wave. This sends constant DC voltage to the voice coil, causing it to overheat and fail. It’s almost always better to have extra power than not enough for your system.
Is a 2-ohm subwoofer better than a 4-ohm subwoofer?
A 2-ohm subwoofer isn’t inherently better than a 4-ohm version; the choice depends entirely on your amplifier’s stability. Most monoblock amplifiers produce more power at lower impedances. If your amp is 2-ohm stable, a 2-ohm sub allows you to draw more wattage. However, if you’re wiring multiple subs together, 4-ohm drivers might be necessary to reach a safe final impedance that doesn’t overheat your specific hardware.
How do I know if my amplifier is clipping?
You can identify clipping by listening for a mushy or crackling sound in the bass notes. Many modern amplifiers also include a Clip or Protect LED that flashes when the signal distorts. If you notice your subwoofer’s dust cap is hot to the touch or smells like burning electronics, your amplifier is likely clipping. Professional tuning with a digital multi-meter ensures these levels stay within a safe range for your equipment.
Can I match a different brand of amplifier with my subwoofer?
Yes, brands do not need to match when learning how to match subwoofer and amplifier. Audio components are built to universal electrical standards like RMS and Ohms. We frequently mix and match high-end brands to create custom solutions that fit a specific vehicle’s space or a customer’s budget. The technical specifications are what matter most, not the logo on the heat sink or the brand on the box.
Do I need a capacitor when matching a high-power amp and sub?
Capacitors are rarely the best solution for high-power systems. While they can help with minor dimming of headlights during bass hits, they often become a strain on the charging system. For systems over 1000 watts RMS, we recommend upgrading your battery or alternator instead. A high-output alternator provides the continuous current your amplifier needs to sustain deep, loud bass without starving your vehicle’s electronics or damaging your factory electrical system.
What wiring gauge do I need for my matched system?
Your wiring gauge depends on the total RMS power and the length of the cable run. For systems under 500 watts, 8-gauge copper wire is usually sufficient. High-power systems between 1000 and 1500 watts typically require 4-gauge or even 1/0-gauge wire to prevent voltage drops. We always use Oxygen-Free Copper (OFC) rather than Copper-Clad Aluminum (CCA) to ensure maximum conductivity and safety for all our custom installations.
How do I match two subwoofers to one mono-block amplifier?
To match two subwoofers to one amp, you must sum their RMS ratings and calculate the final impedance of the pair. If you have two 400-watt subs, you need an amp that produces 800 watts at their combined wiring load. Wiring two 4-ohm subs in parallel creates a 2-ohm load. Understanding how to match subwoofer and amplifier in these arrays is key to pulling the most performance from a single-channel unit.