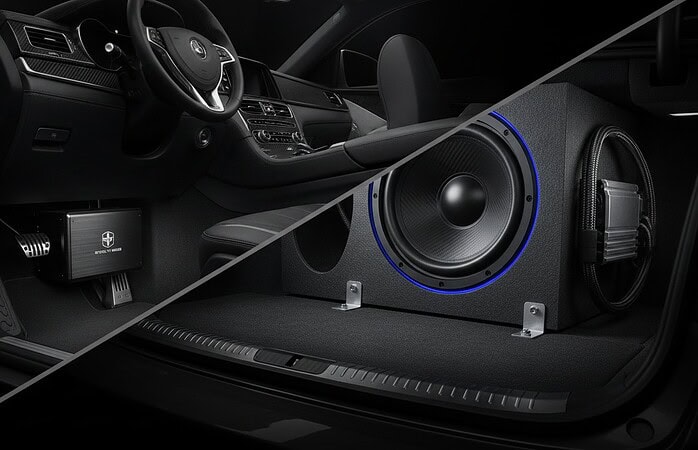
You’ve spent your Saturday afternoon carefully routing wires and mounting your new gear, but when you finally turn the key, you’re met with a deafening silence. Seeing that glowing power light only adds to the frustration because it means your car amplifier turning on but no sound is coming through the speakers. We know that sinking feeling. It’s easy to worry that you’ve wasted money on expensive components or that a complex technical error like an ohm mismatch has ruined your equipment. You just want to hear the results of your hard work and get back to enjoying your drive.
The good news is that silence in a powered system is rarely a sign of a dead amp. It is usually just a communication breakdown between components that we can solve together. This professional diagnostic guide will help you identify the exact cause of the quiet and provide a clear path to restoring your audio. We’ll walk through the signal chain, check your connections, and give you the confidence to know when you can handle the fix yourself or when it’s time to seek expert help. Let’s get your music back where it belongs.
Key Takeaways
- Learn to distinguish between electrical power and audio signal flow to quickly narrow down the source of the silence.
- Use our step-by-step method to test RCA cables and head unit outputs, ensuring a clean signal reaches your equipment.
- Identify why your car amplifier turning on but no sound might be caused by Protection Mode or simple speaker wiring shorts.
- Understand the “Weak Ground” paradox and how improper grounding can allow an amp to light up while failing to produce audio.
- Recognize the signs of internal component failure so you know exactly when to transition from a DIY fix to professional support.
The Silent Treatment: Why Your Amp Has Power but No Sound
We’ve all felt that spike of anxiety when the project is finished but the music won’t play. Seeing your car amplifier turning on but no sound coming from your subwoofers or door speakers is a specific kind of frustration. It is helpful to remember that this status actually tells us a lot. It confirms the main power circuit is likely receiving a “wake-up” call, even if the audio path is currently blocked. We view this as a communication error rather than a total hardware failure.
The power light can be quite deceptive in a failing system. Many units are designed to stay lit even when they’ve entered a safe mode to prevent further damage. It’s like a car’s dashboard lighting up while the engine refuses to crank. We always start by checking the head unit settings first. Modern car audio systems are complex. A single setting in your radio’s menu, like a disabled “Sub Out” or an accidental Mute, can cause total silence. We verify that the volume is up and the source is active before we touch a single wire.
We often encounter systems where the LED is glowing bright, but the internal MOSFETs aren’t switching. This happens because the power light is usually tied to the low-voltage side of the amplifier’s power supply. It tells you the amp has “permission” to turn on, but it doesn’t guarantee the high-voltage side that drives your speakers is functioning. This distinction is vital when dealing with a car amplifier turning on but no sound because it moves our troubleshooting away from the battery and toward the audio inputs or internal protection triggers.
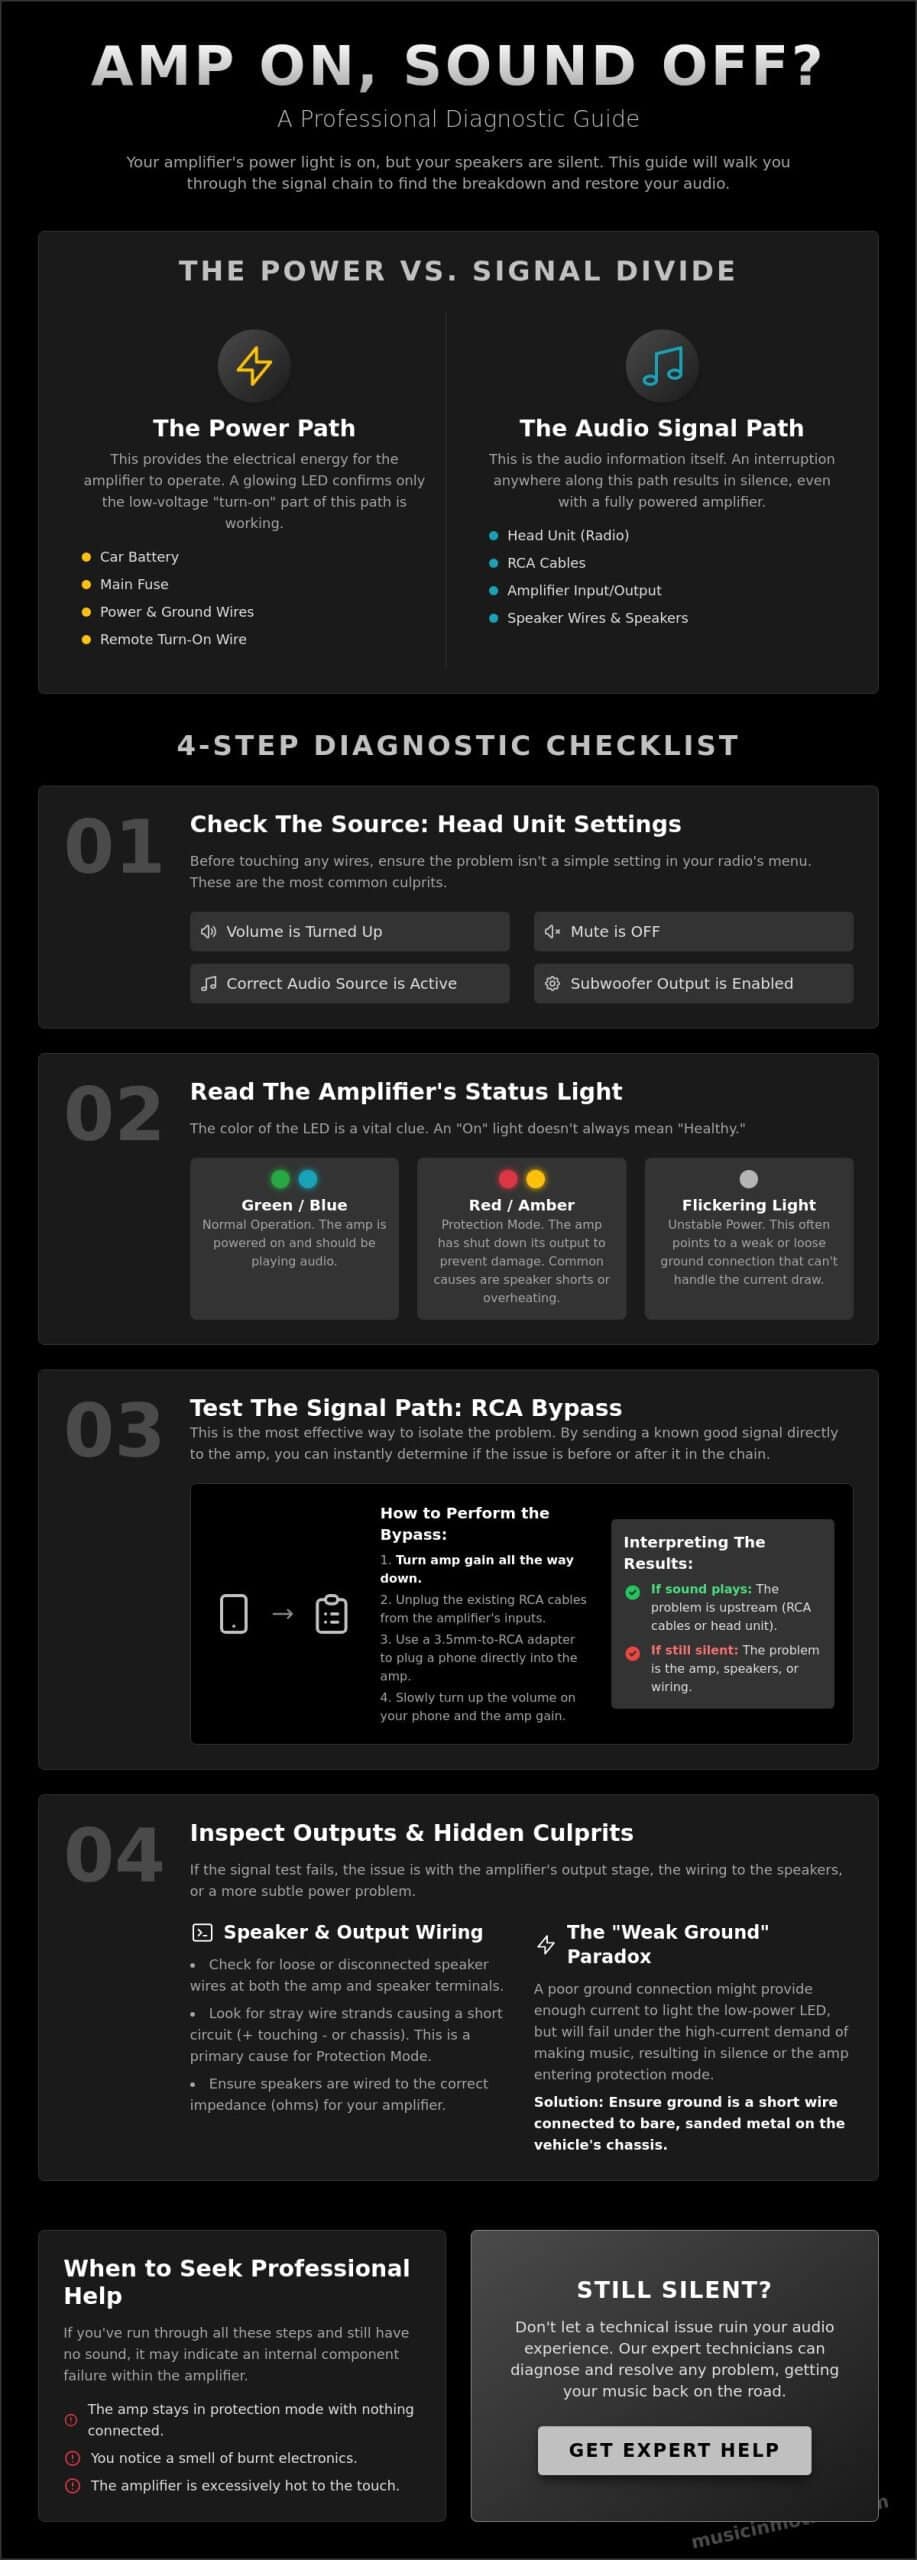
Understanding the Power vs. Signal Divide
Your amp needs power to run the hardware and a signal to tell it what to play. The remote turn-on wire acts as the alarm clock that wakes the internal circuitry, while the RCA cables provide the actual conversation. An amplifier can be awake but not listening if the signal is interrupted. The signal chain travels from the head unit’s preamp outputs through RCA cables into the amplifier’s input stage and finally out through the speaker wires to the drivers.
Identifying the Status Indicator Meanings
Most amplifiers use color-coded LEDs to communicate their health. A solid green or blue light typically signals normal operation, while a red or amber light indicates the unit has entered protection mode. If you notice a flickering power light, it often suggests electrical instability or a loose ground that can’t handle the current. Don’t assume an “On” light means the amp is healthy; it only confirms the 12V remote signal is present.
Tracing the Signal: Troubleshooting RCA and Head Unit Inputs
Once we confirm the amp is receiving power, we shift our focus to the message it’s supposed to receive. A car amplifier turning on but no sound often points to a signal that never left the head unit or got lost along the way. We treat the RCA cables as the critical bridge in this system. If that bridge is out, your speakers will stay silent no matter how much power is flowing through the trunk. We’ve seen many cases where the hardware is perfect, but the communication has simply stopped.
We recommend a physical inspection of the cables first. Look for sharp bends behind the dash or pinches under the door sills. If a cable is crushed by a seat bolt, the internal shielding can short against the center conductor. This kills the audio signal instantly. We also check the source settings. It sounds simple, but we frequently see systems where a high-pass filter (HPF) is set so high it cuts off all audible frequencies to a subwoofer. Sometimes the sub-out setting is accidentally toggled to “Off” during a battery swap or a system reset.
If you’ve recently performed a car audio upgrade for stock stereo, the issue might lie in the integration module. These devices translate factory signals for your new amp. If the module loses its programming or a wire shakes loose, the amp stays on but receives zero data. We always verify these connections to ensure the factory radio and the new amplifier are still speaking the same language.
The RCA Bypass Technique
This is our favorite diagnostic trick. We use a 3.5mm-to-RCA adapter to plug a smartphone or tablet directly into the amplifier’s input jacks. If the music plays through this temporary connection, we know the amplifier and speakers are fine. This effectively isolates the problem to the head unit or the long RCA run through the vehicle. Always turn your amplifier’s gain down before trying this. You don’t want a sudden burst of full-volume audio to damage your drivers during the test.
Head Unit Configuration and Pre-amp Outputs
Software is often the culprit in modern builds. We verify that the pre-amp outputs are active in the head unit’s “Initial” or “System” menu. Some radios require you to specifically enable the subwoofer channel before it sends any voltage. We also listen for a “turn-on pop.” If you hear a thud when the system starts but no music follows, the timing between the head unit waking up and the amp activating might be out of sync. If these steps don’t solve the silence, we can help you refine your custom installations to find the hidden break in the chain.
Checking the Output: Speaker Wiring and Protection Mode Triggers
If your inputs are clean but you still have a car amplifier turning on but no sound, the problem likely lies in how the amp interacts with your speakers. We often see amplifiers enter a self-defense state known as Protection Mode. This is a built-in safety measure designed to save your expensive gear from permanent damage. Instead of a broken amp, you might just have a protective one. We view this as the amplifier doing its job to prevent a more costly failure.
We always start with a close inspection of the speaker terminals. A single loose copper strand, often called a stray hair, can touch the amplifier’s chassis or an adjacent terminal. This creates a short circuit. The amplifier detects the sudden surge in current and shuts down the output stage instantly. It’s a common issue during DIY installs where wire ends aren’t properly crimped or tinned. We ensure every connection is clean and isolated to maintain a reliable path for your music.
Matching the impedance, or ohms, is another critical factor for stability. If you’ve wired your subwoofers to a 1-ohm load but your amp is only stable at 2 ohms, the system might play for a moment and then go silent. We verify that your wiring configuration matches the manufacturer’s specifications. Pushing an amplifier beyond its rated limits causes it to work too hard, leading to the very silence you’re trying to fix. We prioritize a balanced setup that provides both power and longevity.
Common Triggers for Amplifier Protection Mode
Thermal overload happens when an amp gets too hot. This often occurs in cramped spaces without proper airflow. Over-voltage or under-voltage protection kicks in if your vehicle’s alternator or battery isn’t providing a steady 12V to 14.4V. Finally, short-circuit detection is the most common reason for a car amplifier turning on but no sound after a fresh installation. These triggers are the amplifier’s way of telling you that something in the environment is unsafe for operation.
Testing Your Speakers and Subwoofers
We use a simple 9V battery for a pop test to verify mechanical movement. Gently touch the positive and negative speaker wires to the battery terminals. A healthy speaker will make a small pop or click sound and the cone will move slightly. If there is no movement, the voice coil might be open or damaged. We also check for grounded wires by testing the resistance between the speaker leads and the vehicle’s metal frame. A single grounded speaker lead can shut down an entire multi-channel amp because the protection circuit senses the imbalance and cuts power to prevent internal damage.
The Hidden Culprits: Grounding, Fuses, and Voltage Drop
The most confusing scenario we encounter is the “Weak Ground” paradox. This happens when your car amplifier turning on but no sound is produced, even though the status light looks perfect. It’s a paradox because an LED requires very little current to glow, but driving a speaker requires significant amperage. While the LED might stay lit with a poor connection, the moment you turn up the volume, the system collapses because the return path for the electricity is too restrictive. We see this often when installers use a factory bolt that is coated in paint or primer, which acts as an insulator rather than a conductor.
We also look closely at your fuse configuration. It is easy to overlook internal fuses while focusing on the main power wire under the hood. Most modern amplifiers use ATO or mini-blade fuses on the side of the chassis, while high-power systems rely on external ANL or AGU fuses. A fuse can sometimes “hairline” fracture; it looks intact to the naked eye but fails to pass enough current under load. We utilize high-level car audio fabrication techniques to ensure these components are mounted securely and protected from vibration, which is a leading cause of fuse failure and loose connections.
Achieving a Professional-Grade Ground
Bare metal contact is non-negotiable for high-current audio. We always sand away paint, primer, and rust at the grounding point to ensure the best possible connection to the vehicle’s chassis. If your system is particularly powerful, we recommend the “Big Three” upgrade. This involves increasing the gauge of the wires between your alternator, battery, and chassis. These robust connections eliminate ground loops that cause silence or that annoying high-pitched whine that scales with your engine’s RPMs.
Using a Multimeter for Audio Diagnostics
A multimeter is your best friend when the music stops. We start by measuring voltage at the amplifier’s power and ground terminals. You should see between 12.6V and 14.4V depending on whether the engine is running. We then test for resistance (ohms) between the amp’s ground terminal and the battery’s negative post. A reading higher than 0.5 ohms indicates a “voltage sag” that prevents the amp from producing output. We also verify that the remote terminal is receiving at least 12V from the head unit. If your readings are inconsistent, we can perform a professional electrical audit to pinpoint exactly where your power is disappearing.
Professional Diagnosis: Restoring Your Vehicle’s Audio Performance
We recognize the satisfaction of a successful DIY project. Sometimes, however, the problem hides deep within the amplifier’s own circuit board. If you’ve confirmed that your ground is clean and your signal is present, yet you still have a car amplifier turning on but no sound, you might be dealing with internal component failure. Blown MOSFETs or leaking capacitors are common culprits that require specialized repair. We see these issues frequently in older units or systems that have been pushed beyond their thermal limits. Recognizing when to stop is the best way to prevent further damage to your vehicle’s electrical system.
Integrating new technology into a modern vehicle is a delicate balancing act. Many current models rely on complex data networks to communicate between the dashboard and the trunk. If these digital signals aren’t translated correctly, your amplifier will stay in a perpetual state of “waiting.” We provide professional car audio tuning to bridge this gap. Our experts ensure that your aftermarket upgrades work in harmony with your factory electronics. This approach guarantees that your investment delivers the performance you expected.
Expert Solutions for Complex Audio Issues
Modern vehicles aren’t just cars; they are rolling computers. Data bus systems like CAN-bus require specialized interfaces that speak the vehicle’s specific language. We use custom-fabricated mounting and wiring solutions to prevent the vibration-induced failures that plague standard installs. Our team utilizes advanced oscilloscopes and real-time analyzers to find internal amplifier faults that a standard multimeter simply cannot detect. We don’t just find the break; we optimize the entire signal path for maximum clarity.
Book Your Sound System Health Check
Our philosophy is simple. We prioritize the delivery of a finished result over the mere transaction of goods. When you bring your vehicle to us, we don’t just look for a quick fix. We perform a comprehensive health check on your entire electrical system to ensure long-term reliability. We want you to feel the same excitement every time you turn the key as you did on the day your gear was new. If you’re tired of the silence, schedule your professional system diagnosis with Music In Motion today. We’ll get your music back on track.
Get Your Music Back on the Road
You don’t have to settle for a quiet cabin. Most audio issues are just a puzzle waiting for the right solution. We’ve explored how to trace signals and verify grounds to solve the mystery of a car amplifier turning on but no sound. Whether it’s a simple loose strand at a speaker terminal or a complex software setting in your head unit, the path to clear audio is within reach. We believe that every driver deserves a system that works reliably every time they turn the key.
Since 1994, we’ve been the trusted partner for enthusiasts who demand excellence from their mobile electronics. Our team brings decades of custom integration experience to every project. We are specialists in high-performance car, marine, and powersports audio; we also possess deep expertise in complex vehicle safety and radar defense systems. We focus on the finished result to ensure your gear performs exactly as it should. Get your system back to peak performance—Contact Music In Motion today. We are ready to help you move past the technical hurdles and get back to the joy of the drive.
Frequently Asked Questions
Why is my amp on but no sound is coming from my subwoofers?
Most often, this is caused by a missing signal from the head unit or a loose RCA connection. We check the radio’s settings first to ensure the subwoofer output is active in the software menu. If the settings are correct, we inspect the cables for physical damage or pinches. It is also possible that the subwoofer voice coil has failed; we can verify this with a simple multimeter test to ensure the circuit is complete.
Can a blown fuse cause an amplifier to turn on but produce no sound?
Yes, specifically if the amplifier has separate internal fuses for its output stage. While the main power fuse under the hood allows the status light to glow, a blown internal fuse will prevent any audio from reaching your speakers. We recommend checking both the external AGU or ANL fuses and the smaller blade fuses on the amplifier’s chassis. A hairline fracture in a fuse can often be the hidden cause of a car amplifier turning on but no sound.
How do I know if my car amplifier is in protection mode?
You can identify protection mode by checking the status LEDs on your amplifier. Most manufacturers use a red or amber light to indicate that the unit has shut down its output to prevent damage. This usually happens due to excessive heat, low battery voltage, or a short circuit in the speaker wiring. If you see this light, we suggest disconnecting the speaker wires to see if the amp returns to a normal green or blue status.
Will a bad ground cause my amp to have no output?
A poor ground connection is a very common cause of system silence. While a weak ground might allow the amplifier to turn on, it cannot handle the high current required to drive speakers at audible volumes. We always ensure the ground wire is attached to bare, unpainted metal on the vehicle’s chassis. If the resistance between the amp ground and the battery is too high, the system will fail to produce sound even if the power light is glowing.
Is it possible for a head unit to be the reason my amp is silent?
Your head unit is the brain of the system; if it doesn’t send a signal, the amplifier has nothing to play. We check for muted channels, “Source Level Adjuster” settings, and specific subwoofer enable toggles in the menu. In some aftermarket integrations, the remote turn-on wire might wake the amp, but the audio signal processing could be paused due to a software glitch or a disconnected integration module behind the dashboard.
How can I test my car speakers to see if they are actually working?
We use a 9V battery to perform a quick mechanical test. By touching the speaker wires to the battery terminals, you should hear a faint “pop” and see the speaker cone move. If there is no movement or sound, the speaker’s voice coil might be damaged. For a more precise measurement, we use a multimeter to check for an impedance reading that matches the speaker’s rating, which is usually 2 or 4 ohms in most vehicles.
What tools do I need to troubleshoot a silent car audio system?
We recommend starting with a digital multimeter to measure voltage and resistance accurately. A 9V battery is helpful for testing speaker continuity, while a small set of screwdrivers and panel poppers allows you to access the wiring behind your dash or under the seats. For more advanced diagnostics, we use an oscilloscope to visualize the audio signal and ensure it is clean and undistorted from the source all the way to the amplifier.
Should I reset my amplifier if there is no sound?
Most car amplifiers don’t feature a physical reset button like a computer. Instead, you can reset the system by disconnecting the main power fuse for sixty seconds or by performing a factory reset on your head unit. This can clear software glitches in modern digital signal processors. If your car amplifier turning on but no sound persists after a power cycle, the issue is likely a physical wiring fault or an internal hardware failure that requires professional attention.