Before you start the installation process, you need to understand your classic car’s wiring system. Most classic cars have a positive-ground electrical system, which means that the positive terminal of the battery is connected to the car’s chassis. On the other hand, modern cars have a negative-ground electrical system, where the negative terminal of the battery is connected to the chassis. This difference can create a problem when installing a modern radio in a classic car.
Another challenge when installing a modern radio in a classic car is finding a radio that fits the car’s specifications. Classic cars have different audio systems compared to modern cars, and you need to find a radio that is compatible with your car’s audio system. Here are some factors to consider when looking for a modern radio for your classic car:
Even if it appears complex, replacing an antique radio with a current standard DIN aftermarket device is easy. Experts typically do this by installing the new audio just beneath the dash, which might not be as tidy as previously. The Ultimate Guide To Upgrading the Audio System in Your Restomod, by our friends at Restomod Academy, is a great resource for classic car and restomod audio upgrades.
The significant advantage is that you may enjoy all of the current capabilities of new aftermarket devices without having to remove your dash. When it comes to proper wiring, your experience is heavily influenced by the vintage vehicle you own.
If the system is better suited to your head unit, you should be able to reuse the same components. These can be antenna connectors, power hookups, or even speaker cables. You must purchase a new speaker wire if your vehicle comes with a mono radio. (Elite Restomods is the nation’s premier classic car dealer, and they use Music In Motion for all their car audio designs and installs.)
Many cars built before 1984 have DIN or double DIN stereo slots. You will require a mounting plate specific to your vehicle’s make and model, but it should install similarly to more modern cars.
Your entertainment options are limited even if you have a classic car radio that works precisely as designed when it was manufactured. The first AM/FM car radio did not appear until the 1950s, and AM-only radios were available in cars and trucks until the 1980s. Car stereos did not exist until the 1960s when the first car audio systems with separate left and proper channels appeared.

If you have an older vehicle with non-standard stereo installation locations or sizes, mounting the stereo in a different place will have to get a little more creative. Many owners opt to install a modern stereo in the glove box to maintain the vintage look while also providing a location to install the new equipment without cutting or modifying the dashboard.
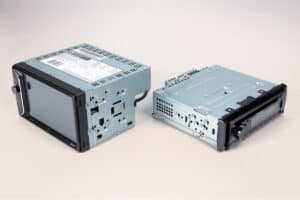
Modern aftermarket vehicle radios largely adhere to the DIN standard. However, radios in pre-1980s cars were mixed bags in size and shape. While changing the head unit in a car constructed in the previous 20 or 30 years is normally a simple task, replacing a historic automobile radio might be more challenging.
Most enthusiasts will probably wish for something other than the engine noise of their classic car to accompany them on longer journeys at some point. A vintage radio may look the part, but it cannot compete in terms of performance with modern equipment.
Radio installation, selecting a suitable speaker location, and running wires through the vehicle are distinct features of a classic car audio installation. Metal doorsills are far more challenging to work with than modern plastic clips, and older materials may have become brittle due to decades of sun exposure.
It is critical to optimize the performance of the sound systems during installation without compromising the appearance and value of the classic car.
Whether you have a cassette deck, a vintage car radio unit, or an eight-track player in your classic car, it is still considered a “car radio.” Modern media formats are also enticing since they are more portable. This could easily entice anyone, even if you said you would stick to the classics. So, you may listen to CDs, Internet radio, and MP3s. In reality, there are several alternatives. The advantage is that you do not have to give up the original design of your traditional dash.
Modern portable media formats can be enticing when you’re trapped with an eight-track player, cassette deck, or a classic vehicle radio that’s merely a car radio, even if you’re determined to maintain your classic.
There are a few changes if you want to listen to CDs, MP3s, or internet radio in your classic automobile or expand your horizons just enough to move from an AM-only to an AM/FM radio. Most do not necessitate giving up your classic dash’s OEM appearance.
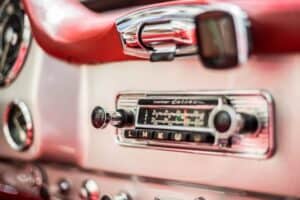
The fundamental difficulty is that old automobile radios and the dashboards they were designed for do not operate with the new DIN standard. Many antique automobile radios are incorporated into the dash, and the modular ones feature a shaft-style broadcast, which is now unusual. The dash is typically designed for a shaft-style radio with two shaft holes and a small rectangular hole. A DIN head unit will be challenging to install without cutting into the dash.
Car stereos can be costly, and it is vital to shop around and listen to a few in different price ranges to see which features and sound quality are best for you. Also, selecting a stereo head unit that will fit into the dashboard without too much room is essential.
Various housing kits are available to hide the stereo in the dash, and most audio stores carry them. Ask your salesperson about the proper kit for your vehicle. Examine your vehicle to see if it also has an audio wiring harness. The new head unit can be wired with a new harness and connected to the vehicle’s existing power and speaker system.
You should also be aware of size limitations for any speakers you purchase. Measure your door panel or wherever your factory speakers are installed. Get a 5-inch-deep speaker if you only have 5 inches to work with.
Remember that most cars have two wiring harness options: into the car and into the stereo. You will need the into-the-stereo harness for a stereo upgrade, which plugs into the vehicle and communicates with the stereo. The plug and wires for your new head unit will be included. To make them communicate, connect the head unit’s plug and wires to the wiring harness that plugs into your vehicle.
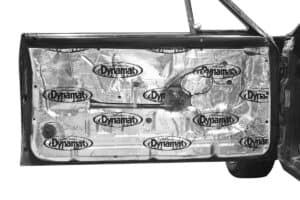
Consider using a sound insulator like Dynamat. Many classic automobiles and trucks feature larger engines and throaty exhaust systems. A sound insulator reduces engine and road noise and improves the acoustics of your car audio system. This step will take significantly more time and money, but the results will be well worth it.
We always recommend using Dynamat to help isolate your music while keeping everything else outside your car. Dynamat, a sound-insulating material, is used inside car doors between new speakers and sheet metal. We love it because it significantly reduces outside road noise, allowing your car to be whisper-quiet (depending on how much you use. Additionally, Dynamat keeps more of your music inside the vehicle, where you can hear it, and less outside, where passers-by can listen.
Modern stereos generate much more heat than older models, so ensure you have enough ventilation. This could imply removing the lining or cutting the back of a glovebox. Besides, they will power a four-speaker system. If you only want to use two, connect the front and rear connections, but keep in mind that the output will be higher.
Fitting them in small cavities can help create an enclosed box behind the speaker. Building the MDF boxes and trimming them to match the vehicle’s interior is recommended if space is a concern.
Choose a head unit that will easily fit into your current car stereo slot if you plan to replace it. Thus, identifying the size of the head unit is essential for a simple replacement. Some car stereos are not of standard size, and these, on the other hand, are custom-sized to make replacing the car stereo more difficult. On the other hand, a custom fabrication kit can be used to replace these units.
Another factor to consider is the depth of the stereo. Unfortunately, the depth varies by vehicle; some cars have shallow cavities while others have deep cavities. It is easier to replace your head unit if you choose a similar depth, but some kits can help you customize your installation if necessary.
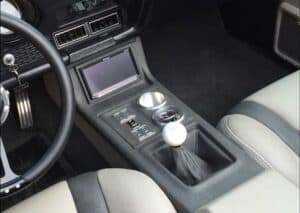
A slim single DIN stereo head unit is standard in most older vehicles. Most of them are two by 7 inches in size and lack a touch screen.
They usually have basic features like an FM radio, an AUX input, or a USB port. On more expensive models, Bluetooth will be conventional.
It will fit in a 7-by-2-inch front faceplate. If your vehicle came with a single DIN car stereo, you could only install another one, and a double-DIN car stereo will not fit because it is more extensive.
A single DIN stereo has a slim profile that will fit almost all classic cars, is usually sold at a low cost has simple functionality such as Bluetooth, USB, and AUX.
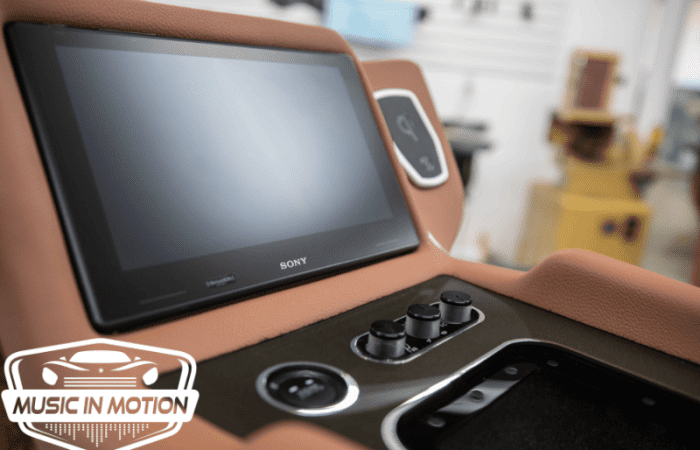
In most cases, a double DIN head unit measures 4 inches wide and 7 inches tall, twice the size of a single DIN stereo. Furthermore, double dins are commonly touch-screen compatible and include various features such as wireless charging, music capabilities, and GPS.
If your car has a double DIN car stereo, you can swap it out for a single or double DIN head unit. If you go with a single DIN head unit, you can add features like a graphic equalizer or a storage compartment.
The most common car stereos are single and double-DIN. Some exceptions exist, such as the 1.5 DIN car stereo, which can be replaced with a single DIN or a custom-built unit.
Upgrading your car audio could mean the difference between a routine commute to work and one that feels like you are riding with a live band on your dashboard. The process of installing a modern radio into a classic car entail:
Connect an ignition-switched power source to your desired location with a wire of sufficient amperage. Install an inline fuse on this wire near the power source; the unit’s maximum power requirements determine the size. Never use a fuse rated for a higher current than the unit or wiring.
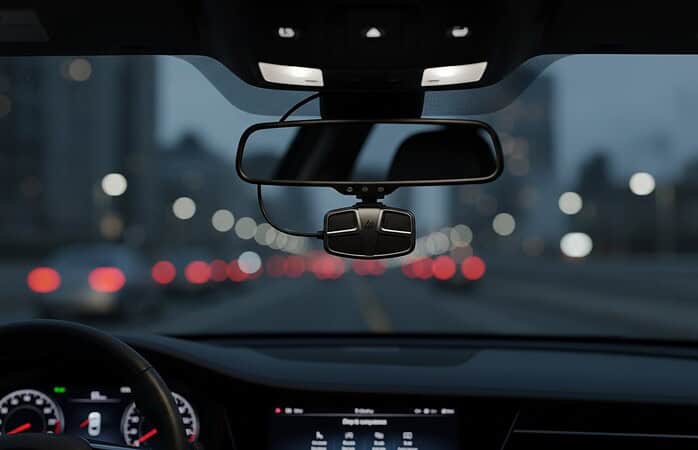
You may want to stream Bluetooth audio to your car stereo but do not require navigation or the more advanced features of Android Auto and Apple car play. Many stereo-head units will suffice. If you want to get a little fancier, look for a head unit that supports the operating system of your smartphone, such as Android and Apple, to enable efficient GPS navigation. Some models have navigation screens that retract into the dashboard when not used. However, remember that the more complex and feature-rich your stereo, the higher the price.
To ensure that your radio’s preset stations are retained:
Fortunately, an entire industry has been dedicated to making this as simple as possible, with adapter harnesses available for almost any car you can think of.
When looking for the proper wiring harness, you will want to remember that most cars offer two harnesses. The first is the into-the-car harness, and the second is the into-the-stereo harness. You will wish to use the into-the-stereo harness for a stereo upgrade, as this is the crucial part that connects to the car and interfaces with the stereo. Besides, your new head unit will have its plug with wires coming out of it. To get them working with each other, it is vital to join the head unit’s plug and wires to the wiring deploying that plug into your car.
Many factory head units incorporate anti-theft mechanisms to keep criminals from taking your audio. That means you will need to place a specific tool, generally a pair of prongs with unusual shapes, into the sides of your factory head unit before it releases and glides out of the dash. It is occasionally feasible to make your stereo removal tool. The correct tool, on the other hand, is typically inexpensive to acquire, and having the right equipment to remove your stereo will make the operation much quicker and faster.
A block connector is built into your radio. If you do not want to void the warranty, cut the wires or purchase an adaptor. Connect the power, backup power, and earth cables to the ones you have already prepared using the circuit diagram. To connect all power-source wires, isolated connectors should be used.
Connect the main plug for your newly wired stereo. The AM/FM radio antenna will also be identified. It will be the only connector of its kind, naturally a round cable with a single prong sticking out of the center. Other devices, such as subwoofers, satellite radios, and CD changers, will have their plugs and may or may not work with your new head unit.
Replacing the speaker cables is always a good idea. Choosing a speaker rated as suitable for the head unit ensures sound-deadening by adding mass to panels and absorbing vibration. Some classic vehicles may already have bespoke fitments hidden behind door trims; if not, you may need to cut the panels or fabricate your boxes.
Through integrating digital signal processing in classic cars, which is a device that enables audio input and music to sound amazing.
If the classic vehicle fails to have an aerial, locate one – the roof is usually preferable to a wing top.
Drill through the bodywork carefully, using masking tape to keep the drill bit from wandering. Windscreen-mounted aerials are available if you do not want to take a power tool to your bodywork.
Make an MDF fascia if you are concealing the stereo within a glovebox, for example. Use the cradle that came with the head unit as a template for the mounting hole. Before installing the fascia, cover it with vinyl or trim. Make sure there is adequate ventilation.
Insert the cradle through the fascia hole and bend the securing tabs over. Feed the connector block through the fascia and connect it to the head rear. Besides, connect the aerial (you may need an adaptor for this), then slide the unit into the fascia until it clicks into the cradle.
If you are experiencing interference while driving, you may need to use a noise suppressor. It connects to the coil terminal, removing ignition system interference.
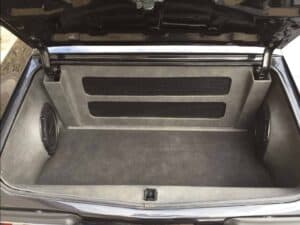
A subwoofer can be installed if more bass is required. Minor powered versions are easily concealed beneath a seat or in the trunk.
After everything has been linked and wired, place the head unit in the dash until it is securely in place. Once fully fitted, many head units will easily snap into place, and others may necessitate using screws to keep them in place. Finish your installation by installing any trim surrounds or faceplates that are required.
After installing the new head unit, you will be streaming wireless car play music from the time. Connect them according to the directions that came with your head unit, and you are ready to go.
Now that your new head unit is running, you may realize that you require more sound than your standard speakers can provide. You may even demand total power than your new head unit can give, necessitating the installation of an amplifier. All of this and more are possible regardless of the classic car.
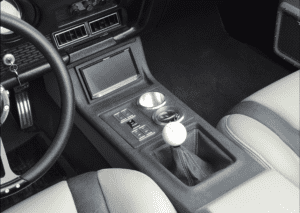
There are two methods for installing a modern DIN head unit under the dash: grafting or cutting into the dash to make room. The first option is to install hidden car audio that will operate with any make, model, and year combination.
There are no compatibility issues to be worried about because hideaway car stereos are designed to be “hidden away” in a glove box, beneath the dash, or beneath a seat. The old car radio is generally left in place for display, but the disguised unit is wired for speakers, antenna, and power. Hideaway car stereos are typically operated using a portable remote-control unit, which is less convenient than twirling the dash knobs, and some are controllable via smartphone or tablet. In either case, a dash mount can make your preferred control method more accessible.
Another option is to replace your classic car radio with a semi-universal replacement and the appropriate faceplate kit for your vehicle. The shafts of these units are typically adjustable on a horizontal axis to accommodate a wide variety of classic vehicles.
The features of these units are usually limited due to the size constraints associated with a direct classic car radio replacement. Finding an immediate replacement for your vintage car radio that can play CDs is difficult. However, they frequently include features such as RCA or 3.5 mm audio inputs, USB ports, and SD card slots, allowing you to listen to music and other audio content in your classic car in various ways.
In some cases, a classic car radio can be replaced with a standard DIN aftermarket head unit by escalating the new stereo beneath the dash, which has advantages. The significant reason for installing a modern DIN head unit under a vintage car’s dash is to take advantage of the possibilities available on innovative car radios without cutting into the dash.
The disadvantage is that escalating a head unit under the dash of a vintage car is often unsightly and inconvenient. It can be challenging to use while driving if you mount it far under the dash so that it is not an eyesore and your passengers do not bang their knees on it.
The vehicle will significantly impact your experience wiring a modern DIN head unit into a classic car. The speaker, antenna, power, and ground wiring should all be reusable. You need to run new speaker wires if your car comes with a mono car radio. If your new rear speakers have fewer than four speakers, you may have difficulty deciding where to place them.
Contact Music In Motion if you’d like to hear one of our world-class demo vehicles including our famous 1969 Chevrolet Nova. We are the world’s premier classic car restomod audiophile design company.

Q: Can I install a modern radio in any classic car?
A: It depends on the car’s wiring system and audio specifications. You need to make sure that the modern radio is compatible with your car’s wiring system and audio specifications.
Q: Is it difficult to install a modern radio in a classic car?
A: It can be a challenging task, especially if you’re not familiar with car electronics. It’s recommended that you seek the help of a professional.
Q: Can I modify my classic car’s wiring system to install a modern radio?
A: Yes, you can modify the wiring system, but it’s recommended that you seek the help of a professional.

Installing a modern radio in a classic car is possible, but it can be a challenging task. You need to make sure that the radio is compatible with your car’s wiring system and audio specifications. It’s recommended that you seek the help of a professional to ensure that the installation is done correctly.
With a modern radio, you can enjoy the benefits of modern audio features while driving your classic car. Upgrade your classic car’s audio system with a modern radio today and experience the benefits of modern audio features while driving.