A faint rattle, a speaker that sounds dull, or audio that cuts out can be easy to dismiss. But small changes may be the first clue that a connection, speaker, or other component needs attention. A car audio system maintenance checklist makes those clues easier to spot before they disrupt your daily drive.
It’s natural to wonder how often to inspect your system, what you can safely check yourself, and when a sound change points to a bigger issue. Routine maintenance doesn’t require taking panels apart or handling wiring. Consistent visual and listening checks can help you notice changes and protect your investment. Use your vehicle and component manuals for inspection schedules and cleaning instructions.
This guide walks through a repeatable routine for checking speakers, visible wiring, and system performance, with practical cues for knowing when to stop troubleshooting. It also explains how professional inspection can help pinpoint concerns with wiring, mounting, or components. Clear sound starts with paying attention to the small things.
Key Takeaways
- Use a car audio system maintenance checklist to make routine listening and visual checks simple and repeatable.
- Compare familiar audio at a moderate volume to notice changes in balance, clarity, rattles, or control response.
- Keep inspections non-invasive: switch the vehicle off, check only visible components, and follow the manuals for care instructions.
- Record when symptoms occur and what settings changed to make troubleshooting more useful.
- Know when a concern involving wiring, mounting, or components calls for professional attention.
Car Audio System Maintenance Checklist: What Owners Should Monitor
Car audio system maintenance means observing accessible audio components and cleaning them carefully to spot changes in sound, controls, or visible condition. It isn’t a substitute for tuning, electrical testing, or repair. The aim is to notice what has changed, keep a useful record, and recognize when a concern needs professional attention.
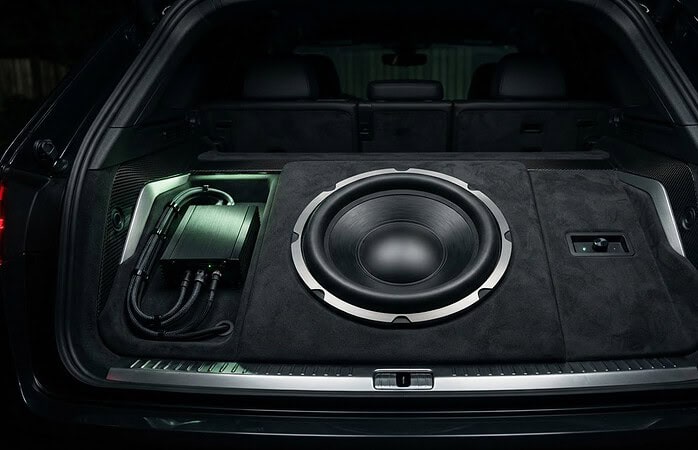
A system includes more than the stereo. Speakers, amplifiers, head units, and their connections all contribute to what you hear. This overview of vehicle audio equipment can help you identify the parts you’re monitoring. Distortion, rattles, control issues, or visible looseness can be signs of wear or a developing fault.
What belongs on a car audio maintenance checklist?
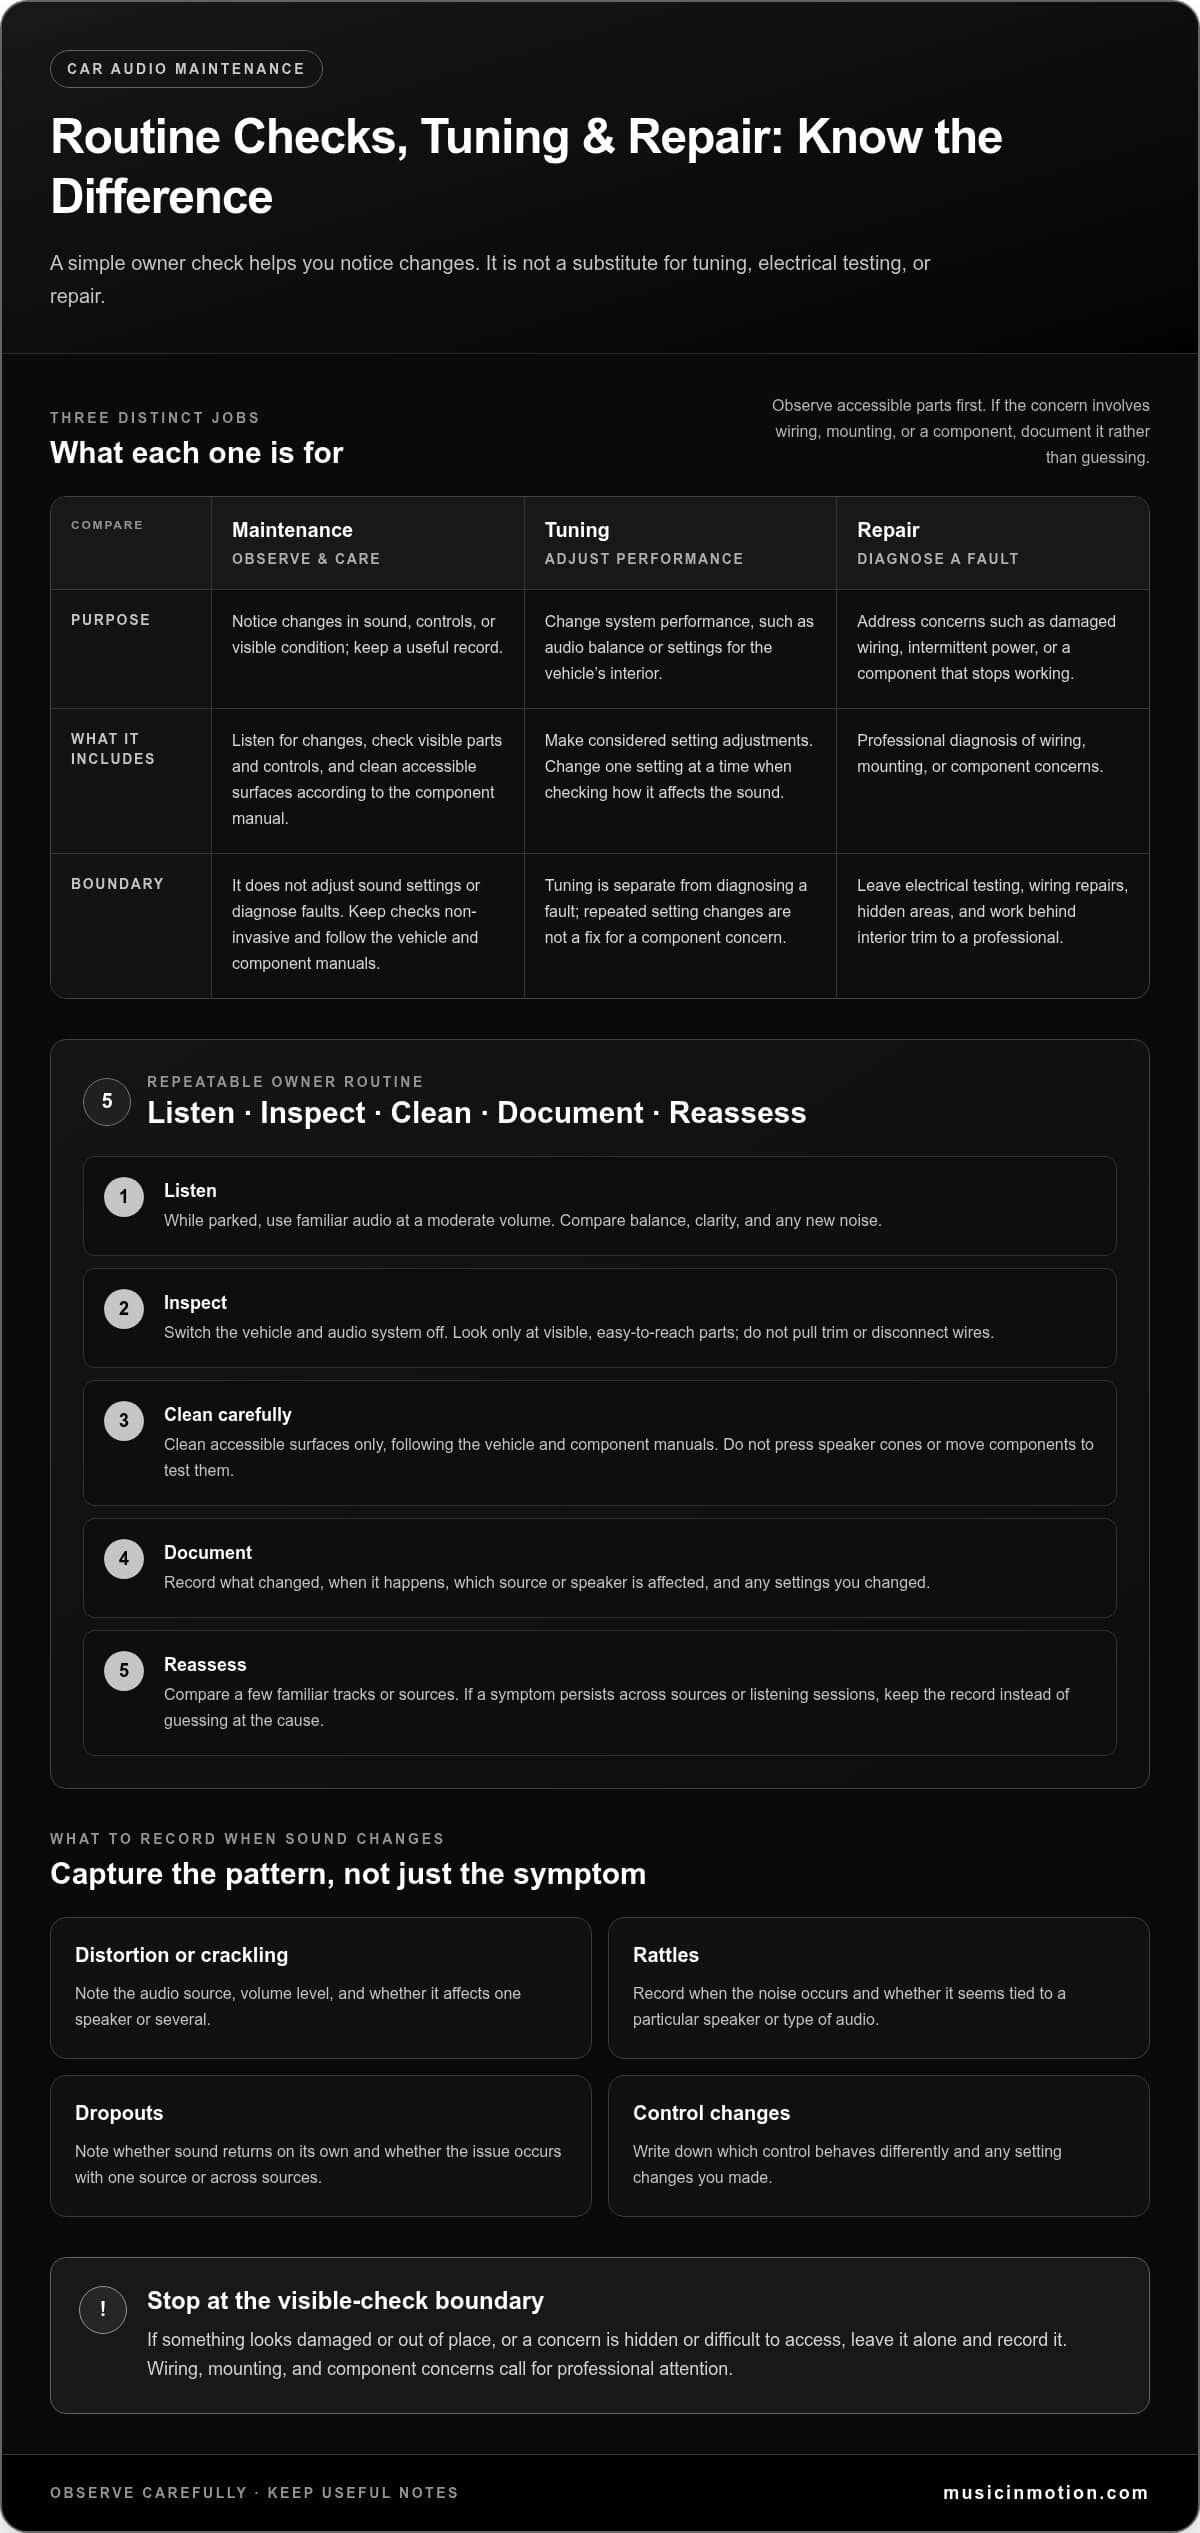
A practical car audio system maintenance checklist has five repeatable steps: listen, inspect, clean carefully, document, and reassess. Listen for changes in clarity or balance. Look for visible speaker damage, loose-looking accessible components, and wiring that appears exposed or out of place. Check that controls respond as expected, and note changes in how components appear to be mounted.
Keep owner checks non-invasive. Observe only what’s visible and easy to reach. Don’t pull trim, disconnect wires, or attempt electrical testing. Follow your vehicle and component manuals for system-specific inspection and cleaning instructions. If an area is hidden or difficult to access, leave it alone and record the concern instead.
How is maintenance different from tuning or repair?
Maintenance means observing condition and keeping accessible surfaces clean according to the component manual. It helps you notice changes, but it doesn’t adjust sound settings or diagnose faults.
Tuning changes system performance, such as the audio balance or settings for the vehicle’s interior. It’s a separate task covered in its own guide. Damaged wiring, intermittent power, or a component that stops working needs diagnosis, not more cleaning or repeated setting changes. A clear record of what you noticed can help Music In Motion assess whether wiring, mounting, or a component needs attention.
Start With Sound: Check Speakers, Controls, and System Performance
Use familiar audio as your reference point. While parked, play a track you know well at a moderate volume, then check whether the sound seems balanced from left to right. Listen for new buzzing, crackling, distortion, rattles, dropouts, or a noticeable loss of output. Familiar audio helps you tell a system change from differences in the recording.
Listen for patterns, not one-off quirks
Compare a few familiar tracks or audio sources before drawing conclusions. A recording may sound harsh on its own, while a repeatable issue across different content is worth tracking. Note whether the symptom comes from one speaker, one side, or the whole system, and whether it appears at particular volume levels. Don’t raise the volume to test a suspected problem.
Change only one setting at a time. For example, check the balance control, return it to its usual position, then assess another setting if needed. This makes it easier to tell which adjustment affected the sound. Practical guidance on essential car audio maintenance can complement these listening checks.
Check controls and visible system behavior
Confirm that the receiver responds normally to everyday commands, such as changing sources or adjusting volume. Check whether settings appear to have shifted unexpectedly, and note warning indicators or unusual heat you can observe without touching hot surfaces or opening equipment housings. Don’t remove panels or access amplifier wiring to investigate. Record what you notice instead.
- Distortion or crackling: Note the source, volume level, and whether it affects one speaker or several.
- Rattles: Record when the noise occurs and whether it seems tied to a particular speaker or type of audio.
- Dropouts: Note whether sound returns on its own and whether it happens with one source or across sources.
- Control changes: Write down which control behaves differently and any setting changes you made.
If a symptom persists across sources or listening sessions, document it instead of guessing at the cause. The professional car audio tuning guide explains performance adjustments. Tuning is different from diagnosing a fault. If your observations point to wiring, mounting, or component concerns, Music In Motion’s professional car audio installation can address the system as an integrated whole.
Inspect and Clean Car Audio Components Without Causing Damage
Keep the inspection simple and non-invasive. Park safely, switch the vehicle off, and make sure the audio system is off before looking over components. A car audio system maintenance checklist should help you spot visible changes, not encourage you to open equipment or test electrical connections.
A visual inspection is for noticing visible condition only. Leave electrical testing, wiring repairs, and work behind interior trim to a professional. If anything appears damaged or out of place, document it rather than trying to tighten, pull, or reposition it.
Which visible parts should owners inspect?
Start inside the cabin with speaker grilles and other accessible audio components. Look for a loose grille, visible damage, an opening blocked by debris, or a change in how a speaker or enclosure appears to sit. Don’t press on speaker cones or push against components to test whether they’re secure.
Next, look at cable runs only where they’re already visible and easy to reach. Note obvious wear, pinching, or a cable that appears out of place, but don’t tug, disconnect, probe, or reach behind panels. If you notice recurring moisture, debris, or vibration around a component, record where and when it happens. Don’t remove installed equipment to investigate.
How can you clean audio components safely?
Check the relevant vehicle and component manuals before cleaning. Materials and care instructions can differ, so use a soft, dry method only if the manufacturer permits it. Keep liquids, sprays, and household cleaners away from speaker cones, openings, controls, and electronics. Don’t assume a product that’s safe for a dashboard is suitable for audio equipment.
Use this short sequence:
- Switch off: Turn off the vehicle and audio system before inspection or cleaning.
- Look first: Check visible grilles, openings, accessible cable runs, and component mounting for changes.
- Clean only as directed: Follow the component manufacturer’s approved method, and avoid applying pressure to delicate parts.
- Stop at the access limit: If cleaning requires force, disassembly, or reaching behind trim, leave it to a professional.
- Make a note: Record recurring dirt, moisture, vibration, or visible damage for follow-up.
Gentle care is enough for routine upkeep. If a component looks damaged or a cable appears worn, stop there. Music In Motion can inspect wiring, mounting, or components without turning a simple observation into a risky DIY repair.
Troubleshoot Common Car Audio Changes With a Safe Checklist
A symptom is useful information, but it doesn’t identify the cause on its own. Use this part of your car audio system maintenance checklist to record what you notice and make only simple, non-invasive checks. Note the audio source, affected speaker or side, listening conditions, and whether the issue continues after checking ordinary settings.
| Symptom | Safe first check | What to record |
|---|---|---|
| Distortion | Lower the volume and check whether the sound changes with another familiar source. | Whether it affects one speaker or the whole system, and when it begins. |
| Intermittent sound | Check that the selected source and ordinary audio settings are correct. | Whether sound cuts out on one source or across different sources. |
| Rattling | Listen at moderate volume and note which audio or conditions bring on the noise. | Where the rattle seems to come from and whether it repeats. |
| Unresponsive controls | Check the relevant setting and try the control again without changing several settings at once. | Which control behaves differently and whether the issue persists. |
What should you check when sound cuts out or distorts?
See whether the symptom follows one source, one speaker, or a particular listening condition. Confirm ordinary settings, such as the selected input or balance, but change one thing at a time so you can tell what affects the result. Inspect a connection only if it is already visible and safely accessible. Don’t unplug wiring, pull trim, probe circuits, or attempt electrical tests without appropriate expertise.
If sound cuts out repeatedly, distortion persists, or the problem worsens, stop troubleshooting and arrange a professional assessment with Music In Motion. Stop using the system if you notice unusual heat or an electrical smell. Don’t open equipment housings or handle wiring to investigate.
What can cause new rattles or loose-sounding audio?
Audio vibration can make a grille, trim piece, or enclosure seem loose, but the sound alone can’t confirm what’s moving. Note whether the rattle appears with particular audio or at a certain volume, keeping playback moderate. Don’t remove panels or tighten hidden hardware as a routine check. If the noise keeps returning, share when and where it occurs with Music In Motion so the mounting and surrounding components can be assessed.
If a system concern has you considering a different setup, explore custom car audio upgrades for ideas on improving your in-vehicle listening experience. For a system with persistent distortion, dropouts, or rattles, start with a professional inspection before making changes.
Keep the Checklist Simple and Know When to Get Professional Help
A useful routine is one you can keep up with. Review your system periodically, following the inspection and care guidance in your vehicle and component manuals rather than relying on a one-size-fits-all schedule. The purpose of a car audio system maintenance checklist is to recognize changes and keep a clear record, not to replace tuning or professional diagnosis.
How can a simple maintenance log help?
A short note can turn a vague concern into useful information. Record the date, what you noticed, the conditions when it happened, and the speaker or component involved. If you changed an ordinary setting, note what you changed and whether it made a difference. Include whether the symptom returned or appeared with different audio sources.
- Date and conditions: Note when the issue occurred and what was happening at the time.
- Symptom and location: Describe the sound or control change and identify the affected speaker or component, if apparent.
- Changes made: Record any settings you adjusted and whether the symptom persisted.
Share these observations with Music In Motion. A concise record helps focus an inspection without requiring you to remove trim, disturb wiring, or attempt invasive troubleshooting.
When should a car audio system be professionally inspected?
Arrange professional attention for persistent dropouts, exposed or visibly damaged wiring, components that appear physically damaged or loose, or suspected electrical issues. Stop troubleshooting if a fault worsens or you notice unusual heat or an electrical smell. Don’t disconnect wires or test circuits yourself. Music In Motion can assess how components, mounting, wiring, and the vehicle’s existing electronics work together.
Music In Motion provides professional car audio installation and custom integration, helping address concerns that go beyond routine observation. If a speaker or enclosure seems poorly fitted, the custom car audio fabrication guide explains how fit and fabrication shape a system. Maintenance supports dependable everyday listening; professional installation brings the components together as a cohesive system.
If you’ve noticed a recurring sound change, loose fit, or wiring concern, bring your notes to Music In Motion for a professional assessment of your car audio system.
Keep Your System Sounding Clear With Consistent Care
A dependable routine doesn’t need to be complicated. Use your car audio system maintenance checklist to listen for changes, inspect only visible components, and follow the care instructions in your vehicle and component manuals. Make a brief note of recurring symptoms so you can spot patterns and share useful details if a concern needs attention.
Keep routine checks separate from repairs. Persistent dropouts, damaged components, loose mounting, or suspected wiring issues call for professional inspection, not invasive troubleshooting. Careful checks can help you notice a change while leaving technical work to an experienced installer.
Music In Motion provides professional car audio installation and custom fabrication to bring components together as a cohesive system. If you’re ready to improve your in-vehicle sound or address installation concerns, explore professional car audio upgrades and custom installation.
Frequently Asked Questions
How often should I use a car audio system maintenance checklist?
Follow the inspection and care schedules in your vehicle and component manuals, since systems and manufacturer recommendations can differ. There isn’t one interval that suits every setup. Build a brief review into your routine at a pace that works for you, and check sooner if you notice a change in sound, controls, or visible condition. Keep notes so you can see whether a symptom returns.
What should I check first if one car speaker sounds distorted?
Lower the volume, then check ordinary settings such as balance and the selected audio source. Listen to familiar content and note whether the distortion stays with the same speaker or occurs with other sources, too. Don’t turn up the volume to test it, press the speaker cone, or remove trim. If the sound remains distorted or worsens, stop troubleshooting and arrange a professional inspection with Music In Motion.
Can I clean car speakers with household cleaners?
No. Keep household cleaners, liquids, and sprays away from speaker cones, openings, and electronics unless the component manufacturer specifically approves a cleaning method. Check the manual first; use a soft, dry approach only if it’s permitted. Avoid pressing on speaker cones or trying to remove debris from inside a grille. If safe cleaning would require disassembly or force, leave it to a professional.
Why does my car audio system cut out intermittently?
Intermittent sound can have several possible sources, including settings, the selected audio source, wiring, or a component issue, so the symptom alone doesn’t identify the cause. Note when it happens and whether it affects one speaker or the whole system. Check ordinary settings, but don’t disconnect wiring or test circuits. If the dropout persists, worsens, or occurs alongside unusual heat or an electrical smell, stop and seek professional help from Music In Motion.
Should I disconnect my car battery before inspecting audio wiring?
No, don’t disconnect the battery just to make a visual inspection, and don’t handle or test audio wiring as part of routine maintenance. Limit your check to wiring that’s already visible and accessible. Electrical work can involve vehicle-specific procedures, so follow the vehicle manual and leave wiring diagnosis or repair to a qualified professional. If you see exposed or damaged wiring, stop inspecting and arrange professional attention.
Does car audio maintenance include tuning the system?
No. Maintenance is routine observation and careful care of accessible surfaces, guided by the vehicle and component manuals. Tuning changes system settings to adjust how the audio performs in the vehicle. It’s a separate task, not a substitute for diagnosing persistent distortion, dropouts, or component faults. If you’re looking to change sound performance, use a dedicated tuning guide or work with Music In Motion.
When should I take my car audio system to a professional?
Arrange a professional inspection for persistent sound dropouts, recurring distortion, exposed wiring, physical damage, loose components, or suspected electrical problems. Stop troubleshooting if symptoms worsen, or if you notice unusual heat or an electrical smell. Music In Motion provides professional car audio installation and custom integration. A clear record of symptoms can help focus the assessment.